step-by-step: adding a service flow (version 7)
If you would like your visitors to be accompanied by your chatbot’s service flow from the introduction itself, you’d want to have shortcuts offered to them right away. In this guide, you will learn how to do it.
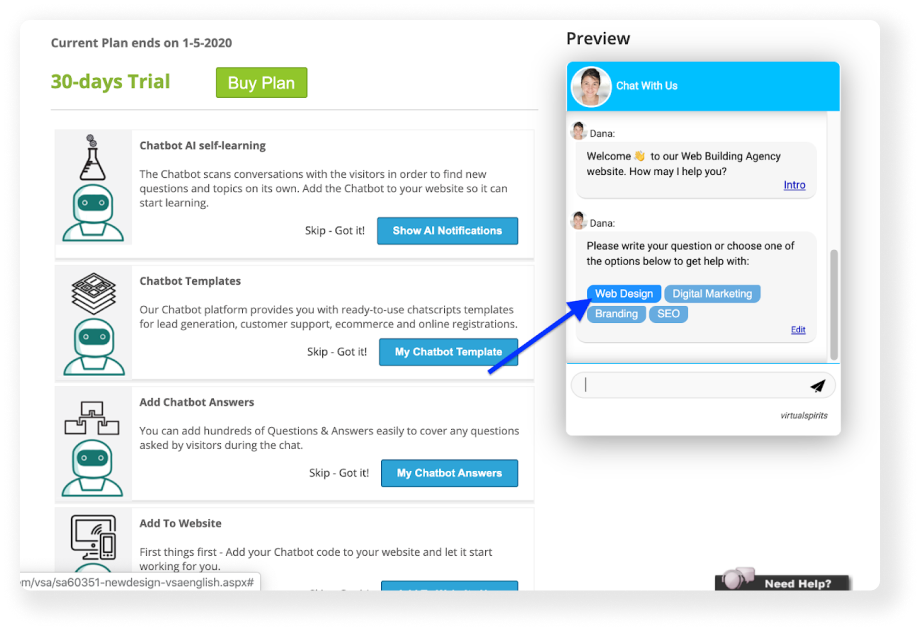
Stage 1 - Adding the shortcut buttons to your chatbot1. Log in to your chatbot control panel
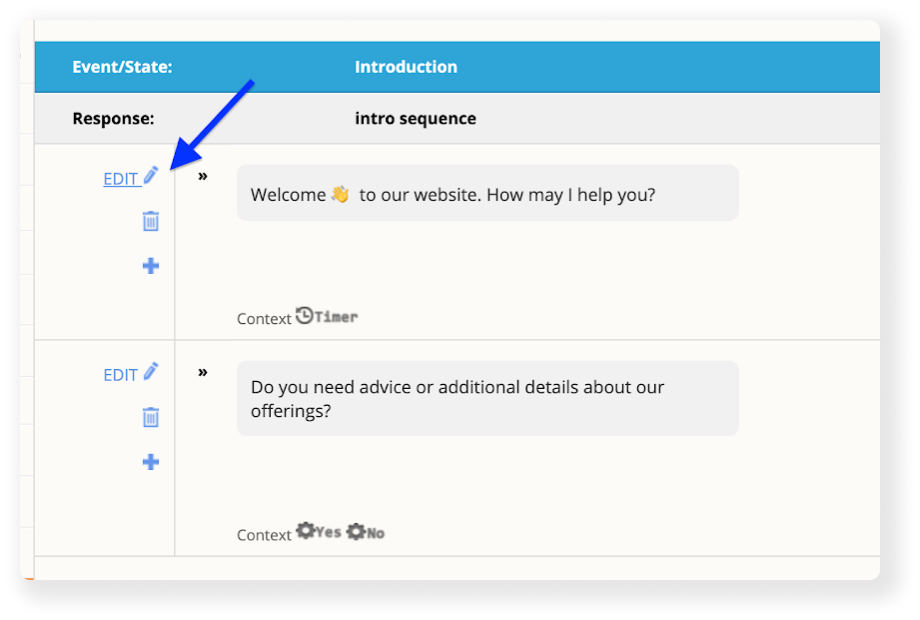
2. On the top menu bar, press the "Tools & Settings" button and then select "Chat Intro Script".
3. Decide what sentence should have shortcuts following it. Next to this sentence, press the “Edit” button.
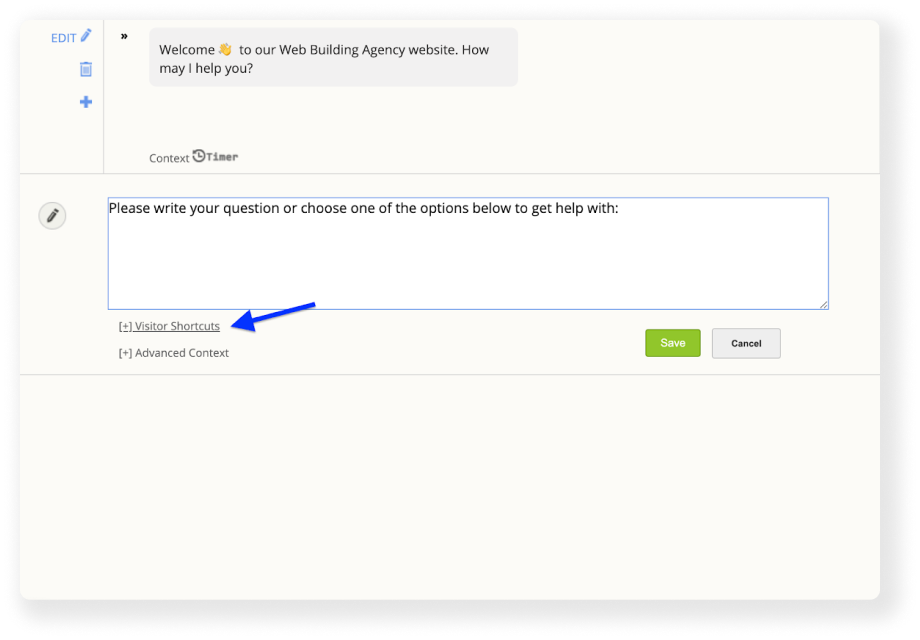
4. Under the textbox, you’ll find the button “Visitor Shortcuts”. Press it.
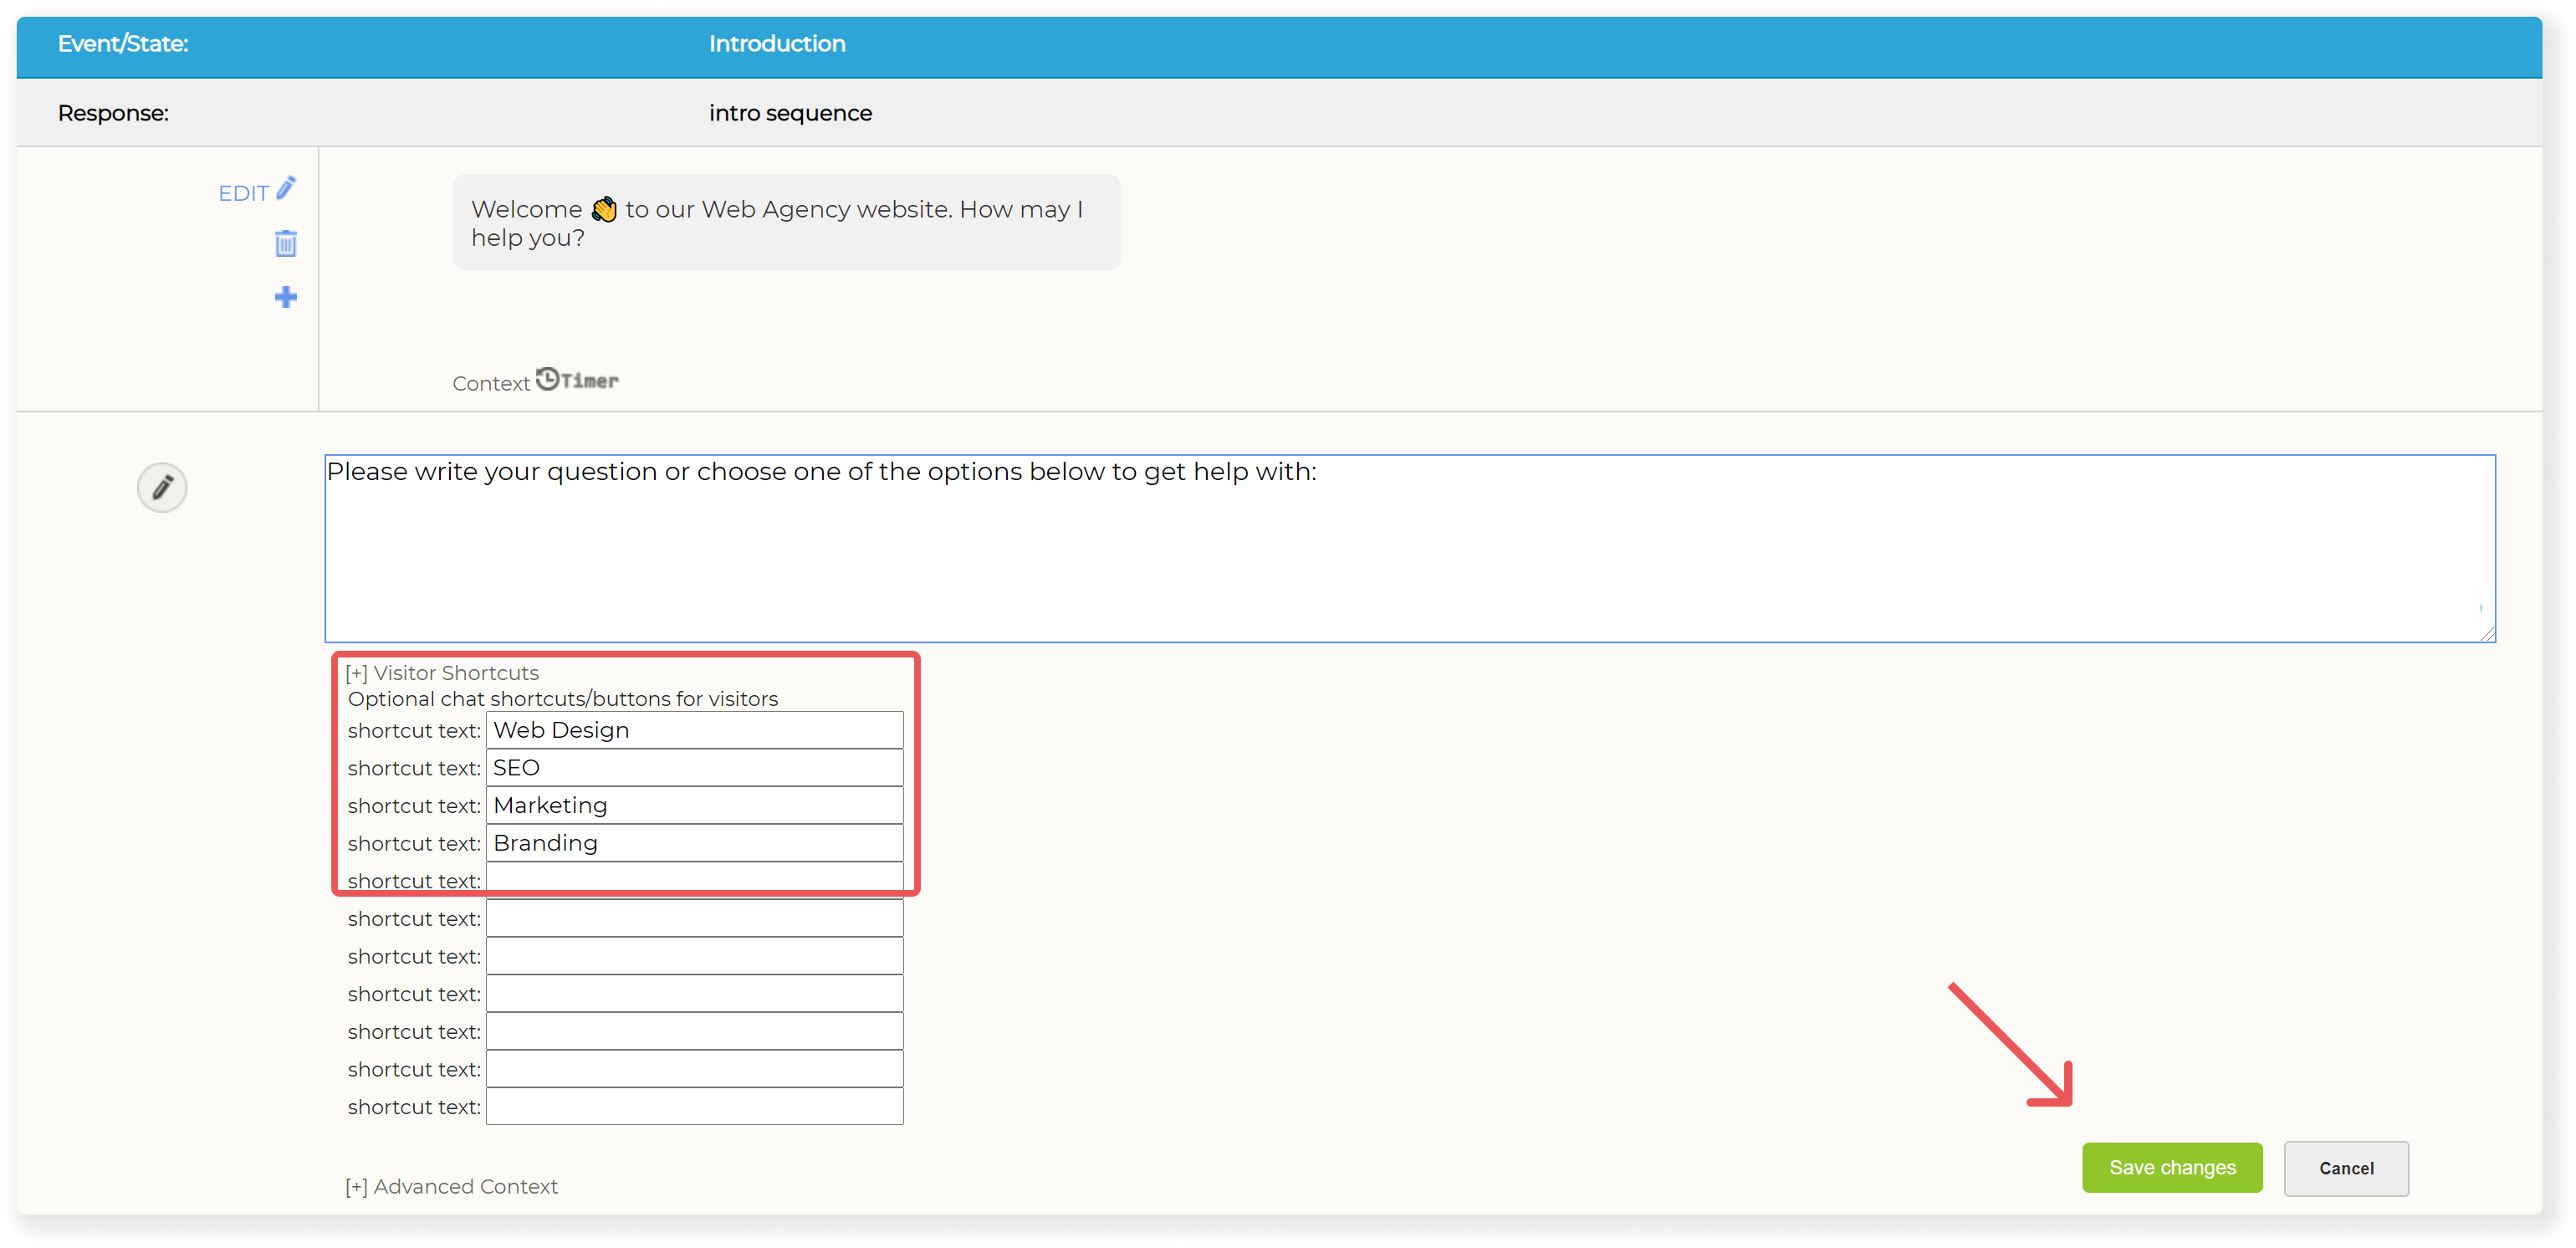
5. Add the text for the shortcuts and press 'save'. Note that when the visitor will click on these shortcuts it will be as if the visitor typed this text in the chat.
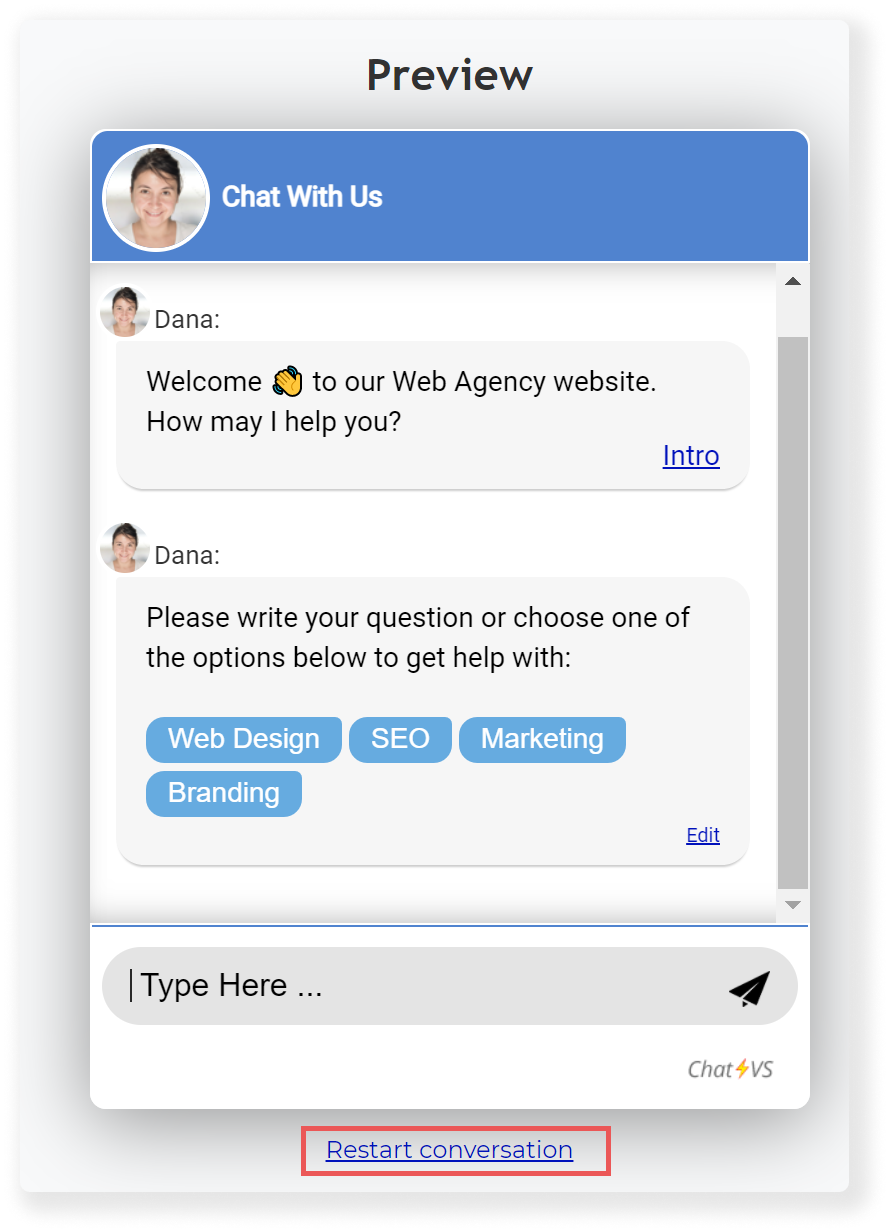
6. Go back to the dashboard on the top menu bar and look at the chatbot preview on the right side of your screen. Press on "Restart conversation", under the chat window. You’ll see the chatbot’s introduction from the beginning. Try pressing one of the shortcuts you just added.
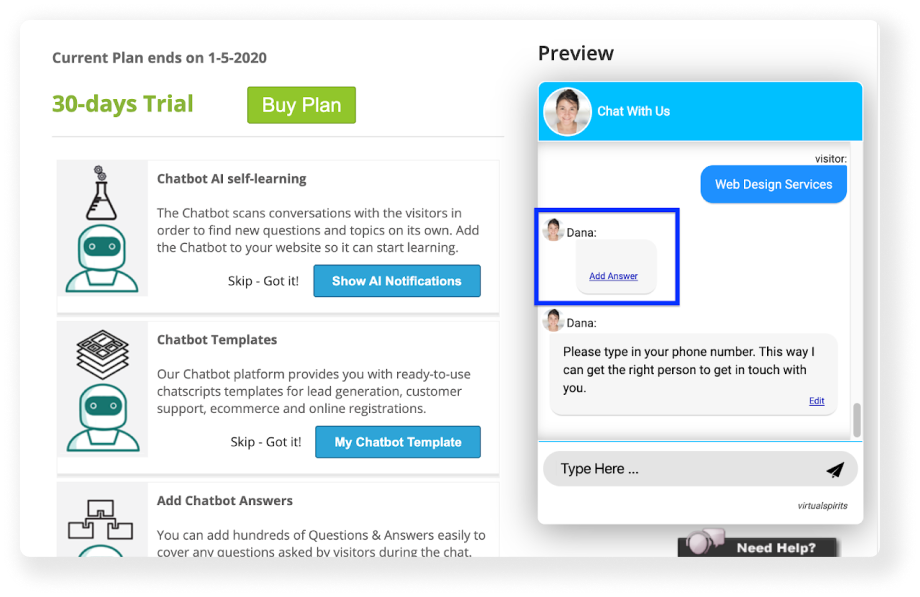
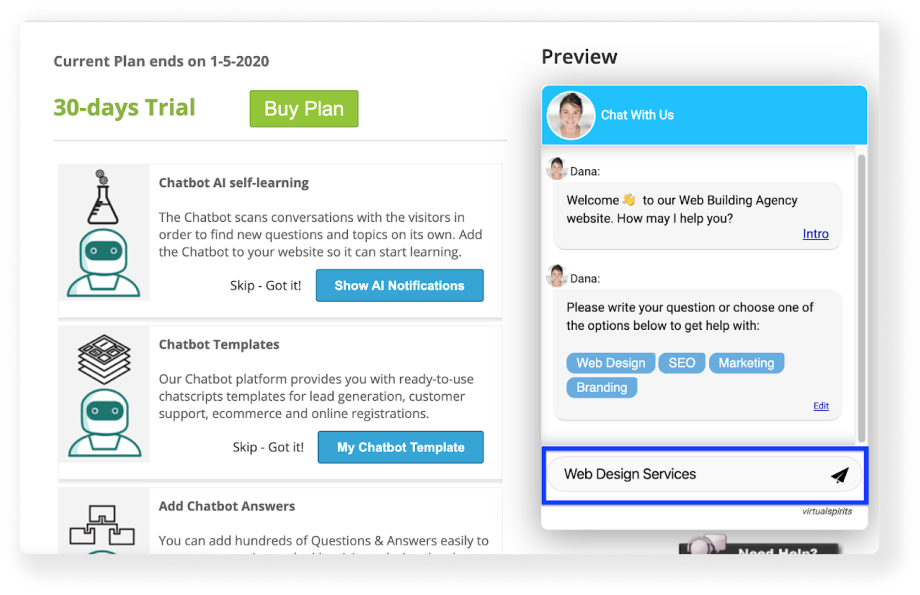
7. You’ll get an empty answer, followed by a generic lead generation. To fix that, you’ll need to add the relevant answers to the chatbot.
 Stage 2 - Adding a answer to follow the shortcut
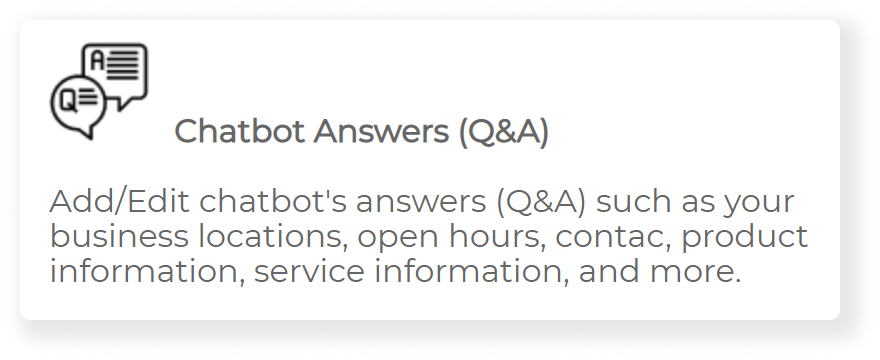
8. On the top menu bar, press the "Tools & Settings" button and then select "Chatbot Answers (Q&A)".
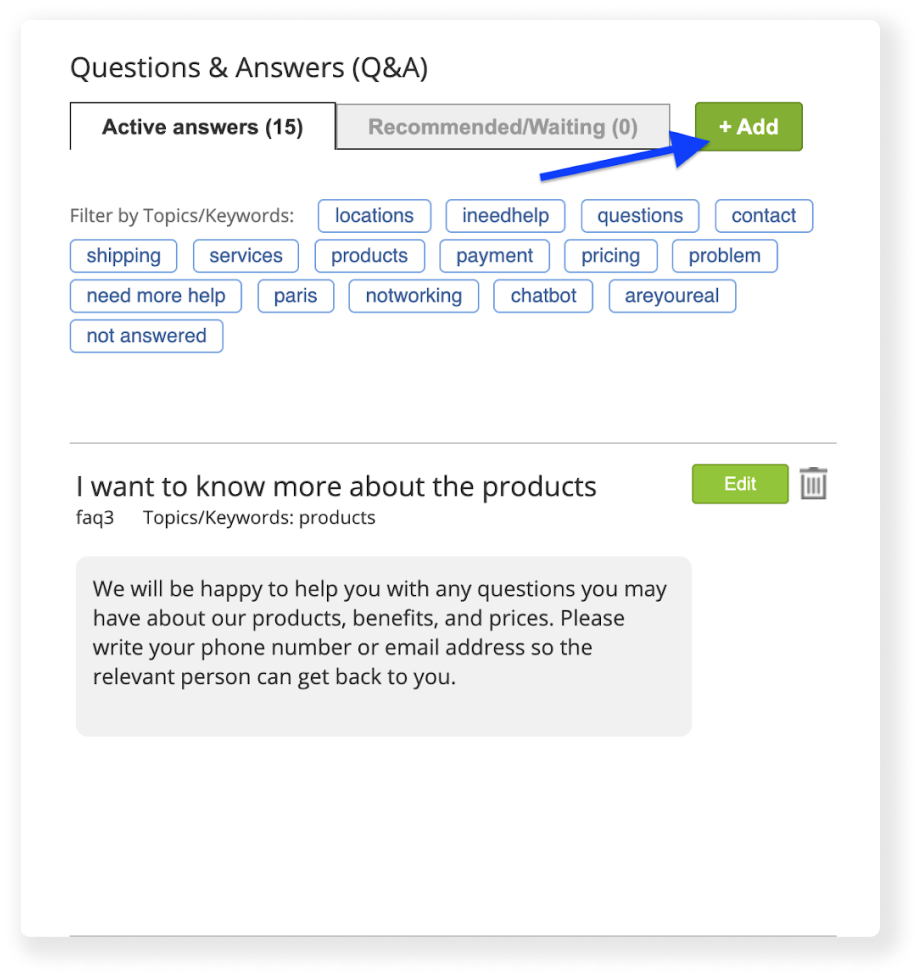
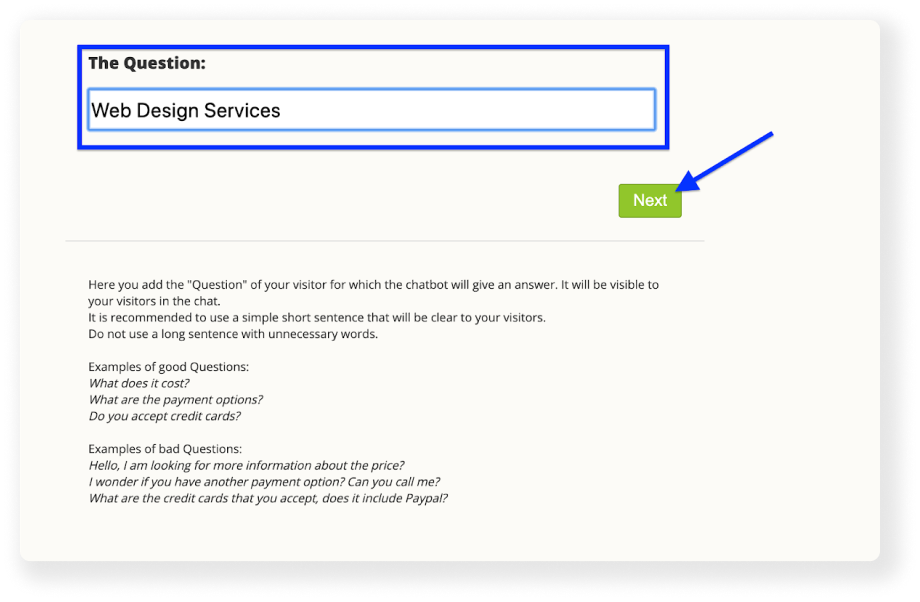
9. On the Questions & Answers Page, Create a new Question by pressing the green "+ Add" button on top.
10. Fill in the textbox your new question - this should be the same text that you filled in the shortcut action textbox in step 5. When You're done, press the 'Next' button.
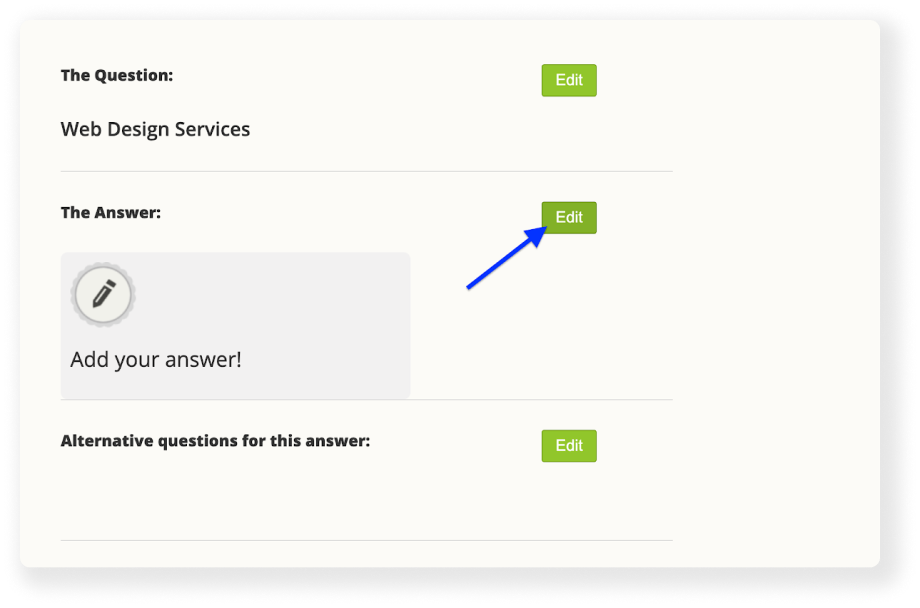
11. Under the title 'The Answer' press the green 'Edit' button. Add the according answer to this question. When you’re done, press ‘Next’ to get back to your question page.
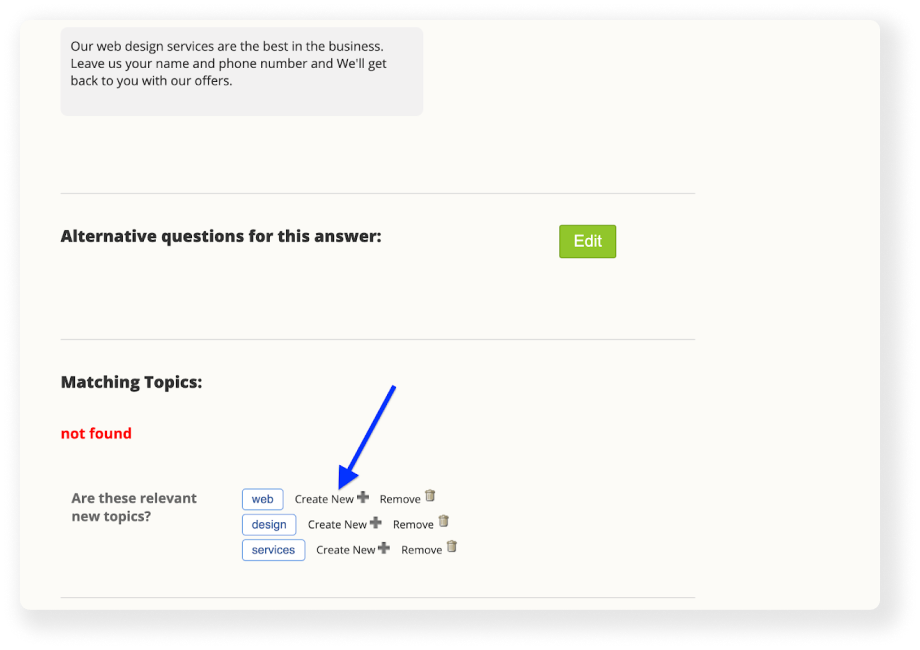
12. At the bottom of the page, Under 'Matching Topics' press the 'Create New' button next to either of the keywords suggested.
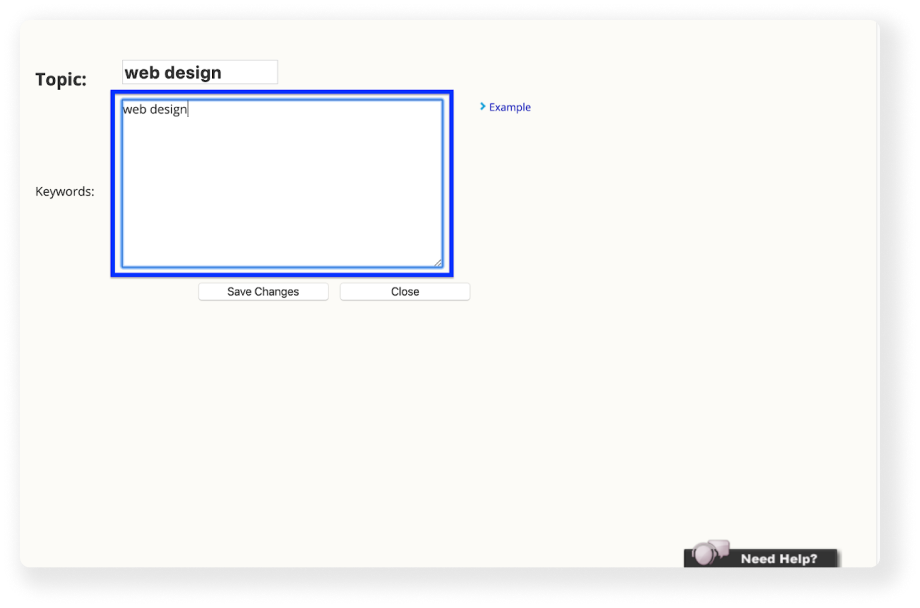
13. Edit Both the topic textbox and the keywords textbox with the topic you’re adding. When you're done, press 'Save Changes', and after the page reloads, press 'Close'. Press 'Finish' when the page goes back to the question view.
Make Sure to repeat stage 2 for any of the questions you added!
 Stage 3 - Checking the button
14. Go back to the dashboard by press on it in the top menu bar.

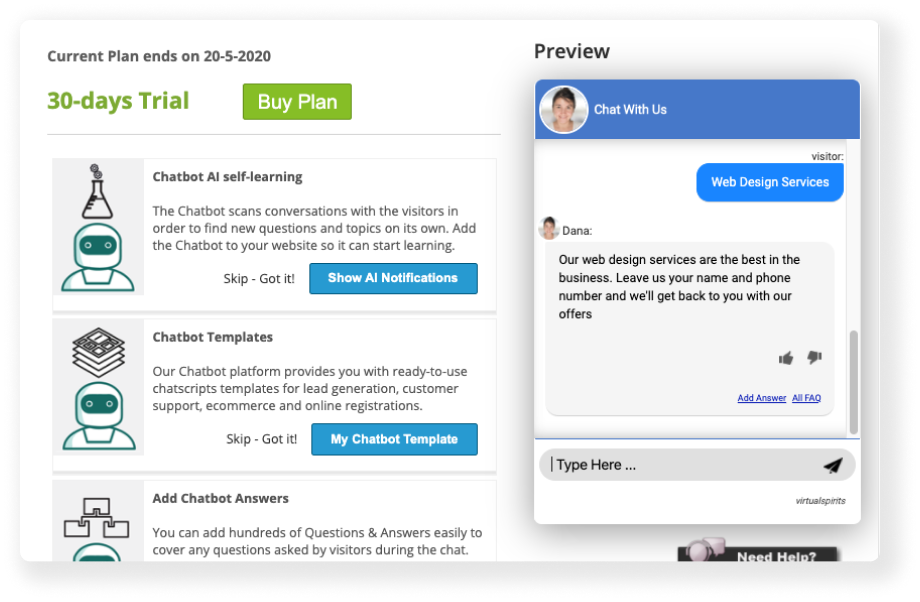
15. Look at the chatbot preview on the right side of your screen. Press again on "Restart conversation". When the introduction appears, click on the shortcuts you added and check if you get the wanted response after.
16. You can also of course get your answers to appear by simply writing the question you added in the chatbot.
17. If everything works correctly - way to go! Go ahead and add more shortcuts to your chatbot’s introduction. If there’s a problem, try to check your steps above. Feel free to get in touch with our support center to solve it.
Advanced option: In case the shortcut display text should trigger a different action text then add this as follows: textdisplay || textaction