Step-by-step: example how to add location information for multiple offices (version 7)
If your business has more than a single location (for example, you have multiple offices or branches) – You would like to let your visitors know about it. In this guide, you’ll learn how to provide the chatbot with this information to better inform your visitors where are you located.
1. Log in to your chatbot here control panel
2. On the top menu bar, press the "Tools & Settings" button.
3. Inside "Tools & Settings" page, select "Chatbot Answers (Q&A)".
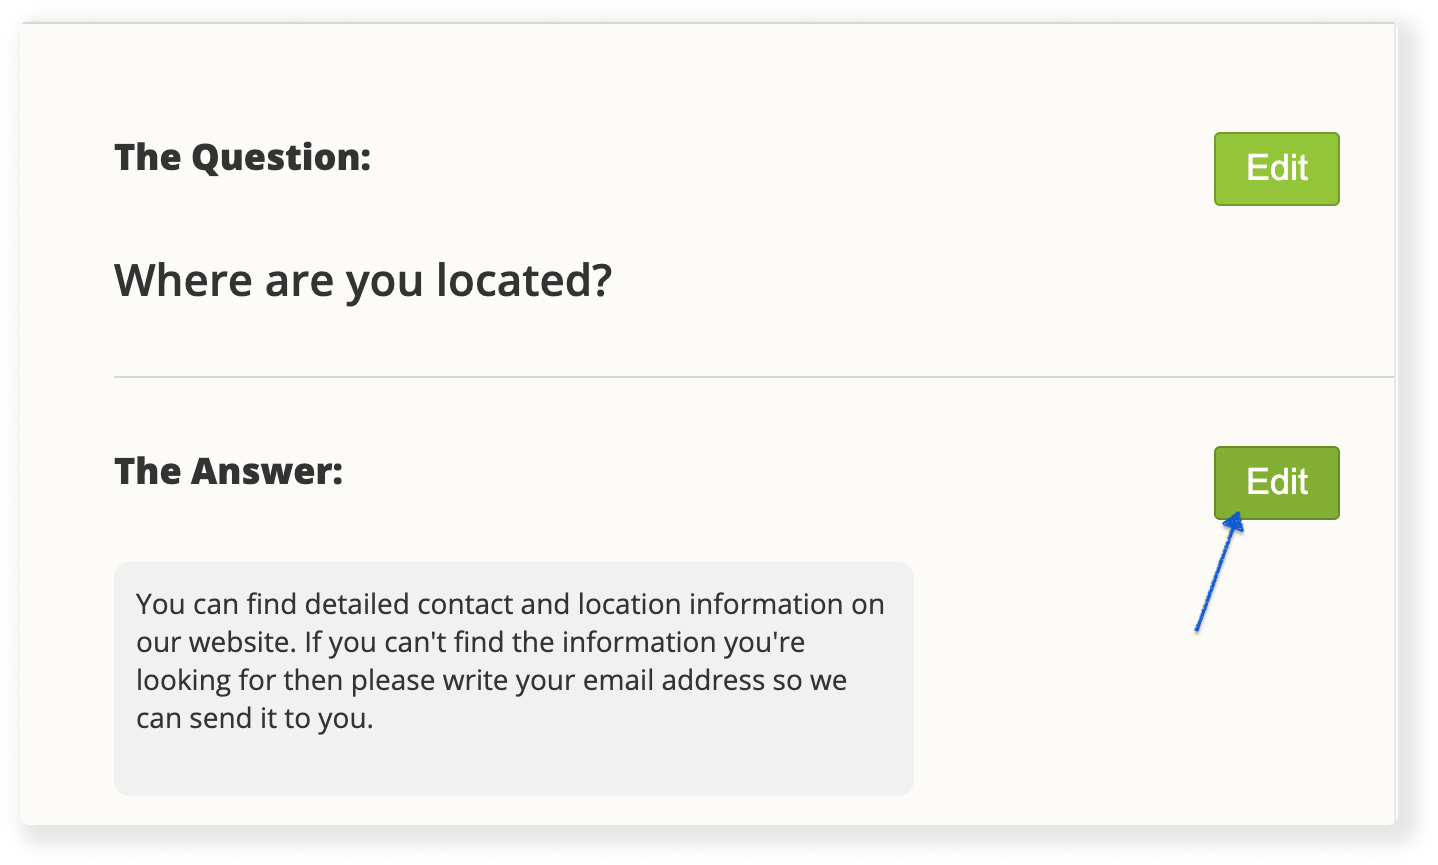
4. Look for the Q&A titled “Where are you located?”. Press the “Edit” button next to it.
(Can’t find the Q&A? You can just create a new one)
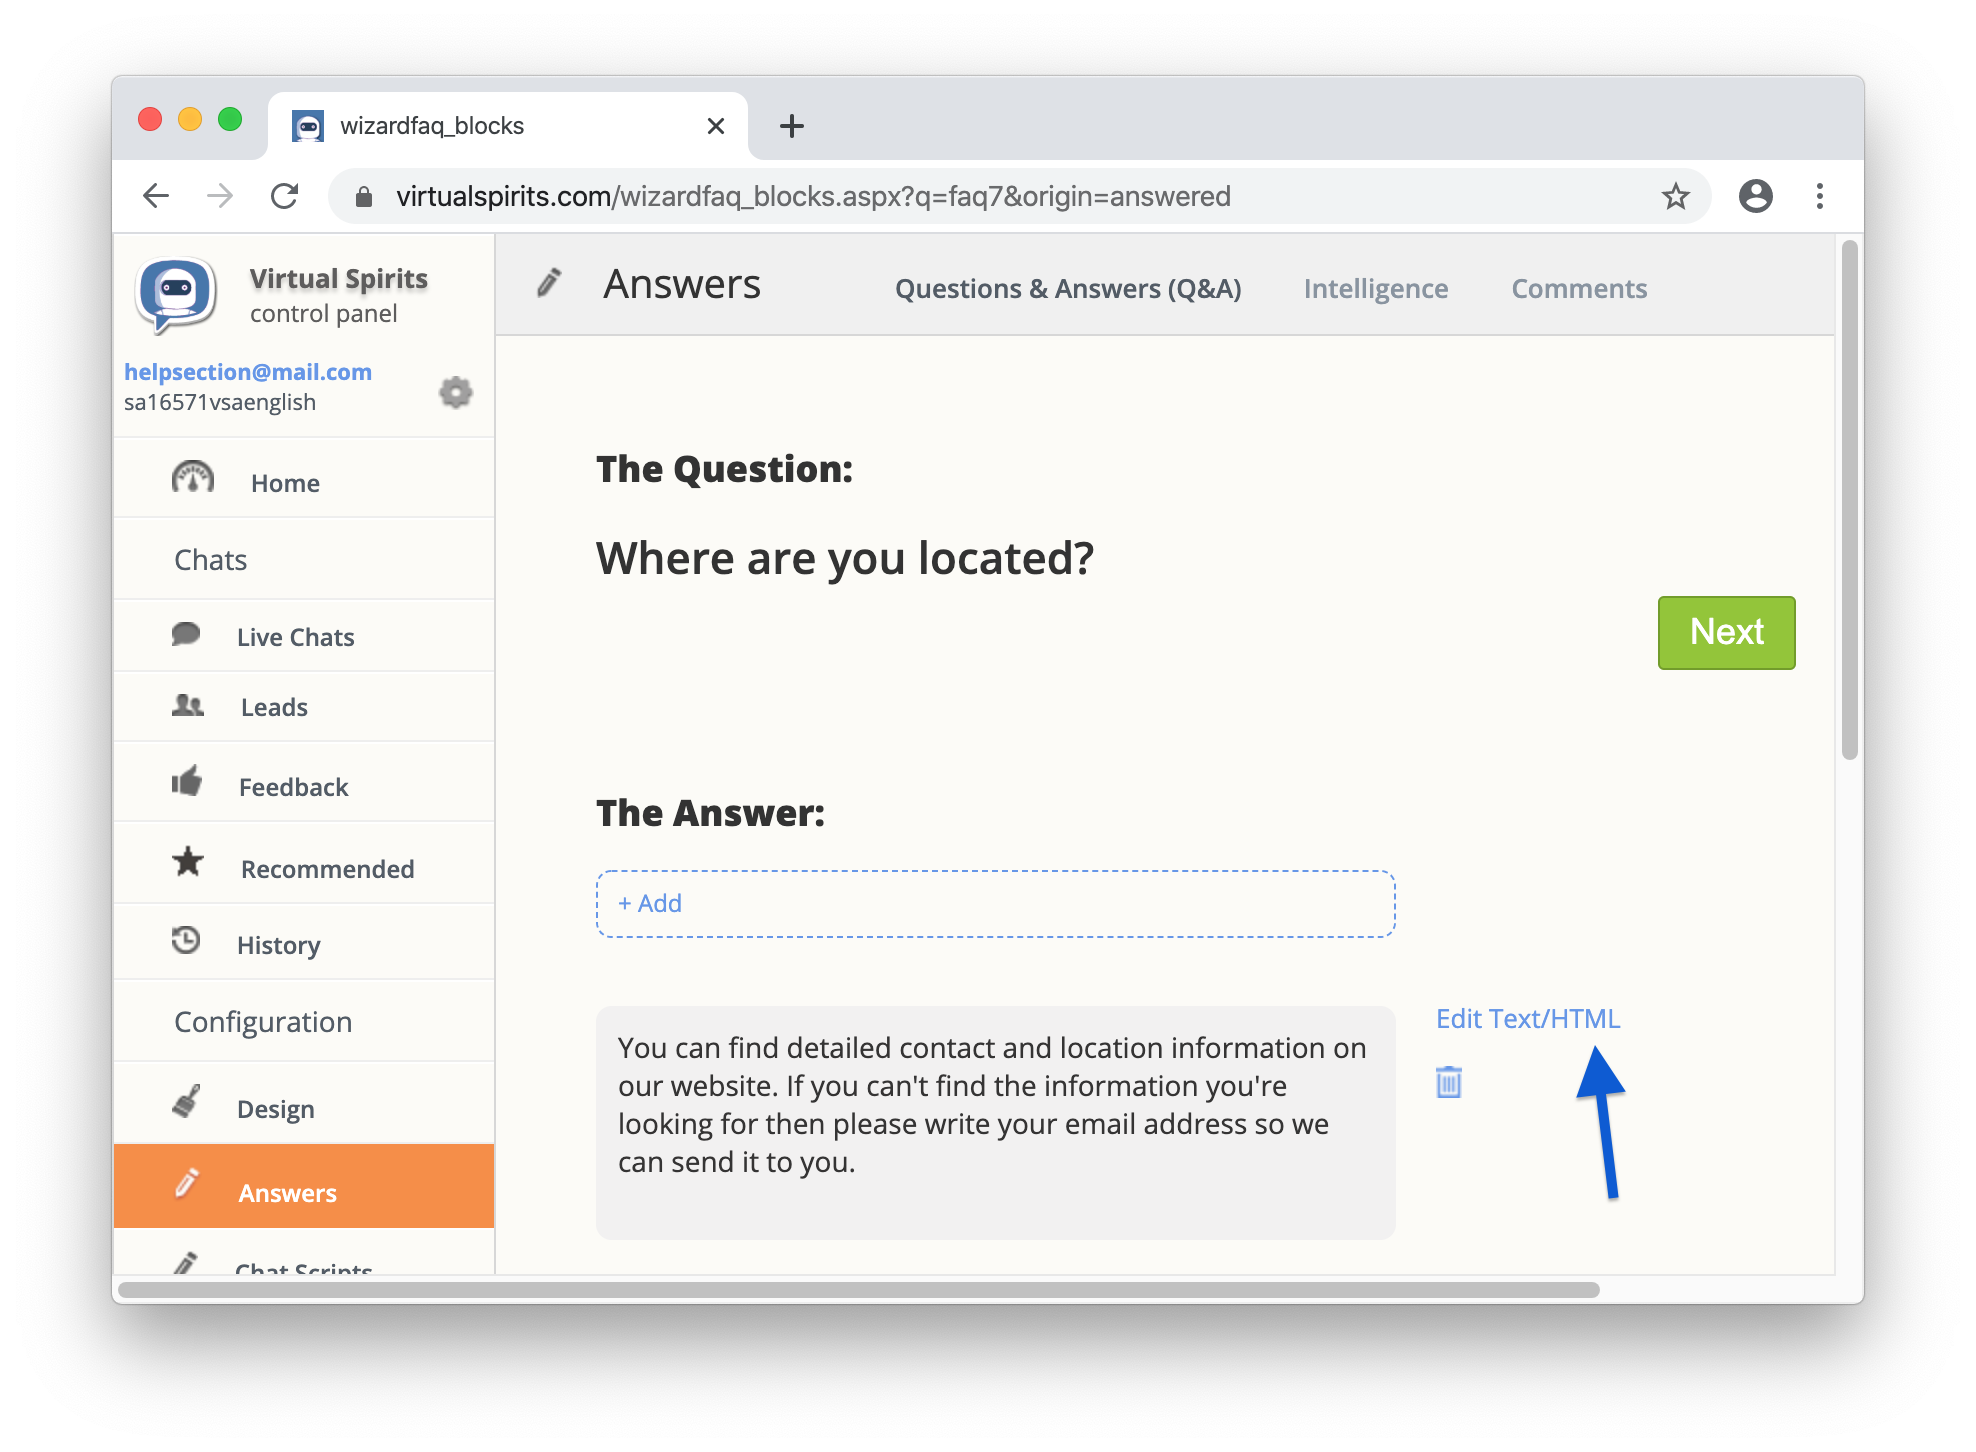
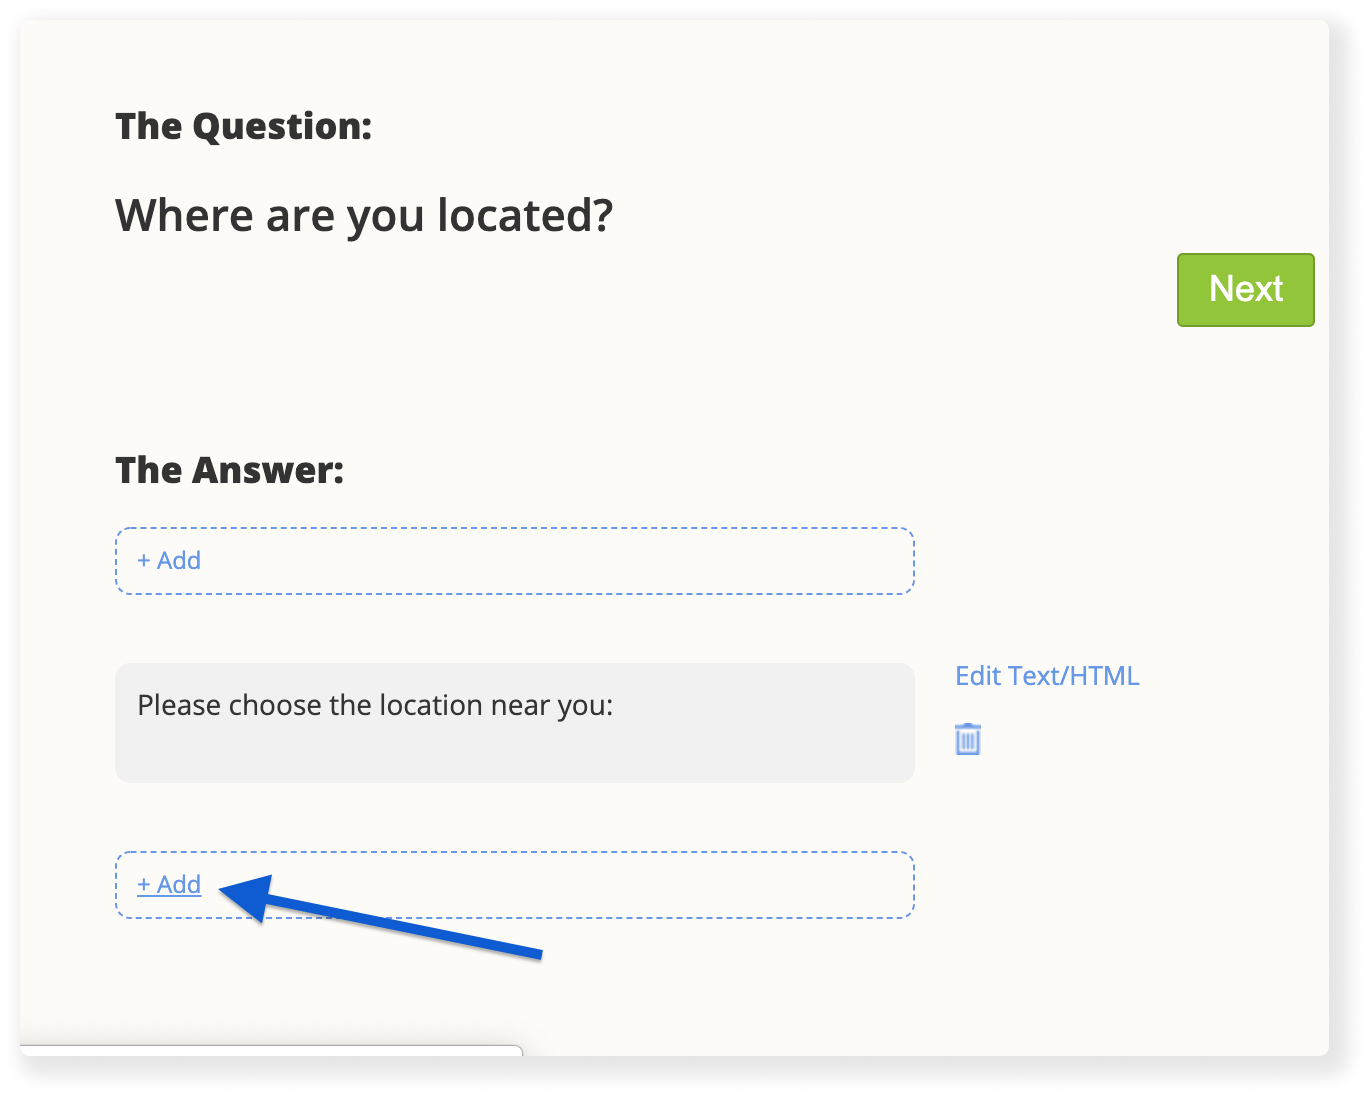
5. Press the “Edit” button next to the answer
6. Next to the paragraph, Press on the “Edit Text/HTML” button
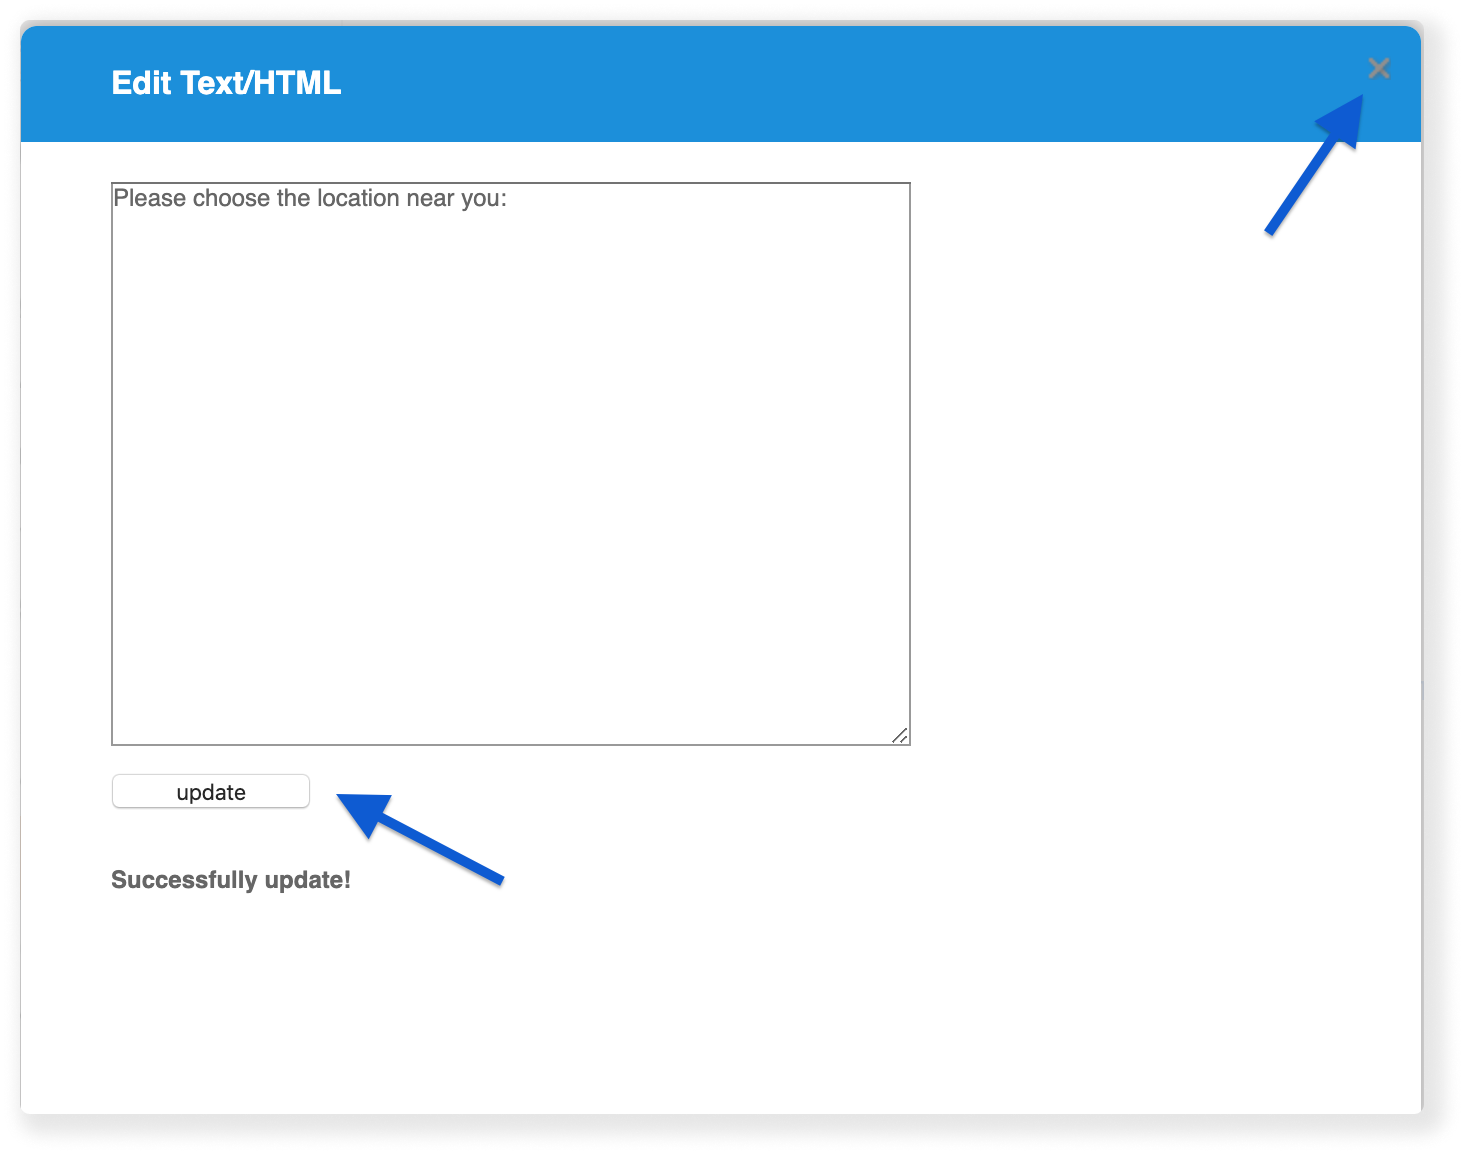
7. Now, You should change the answer to be a sentence that invites the visitor to choose a location that fits him. For example, change it to “Please choose the location near you: “. When you’re done, don’t forget to press the “Update” and “X” button to return to the Q&A screen.
8. Press the “+ Add” button under the paragraph you edited
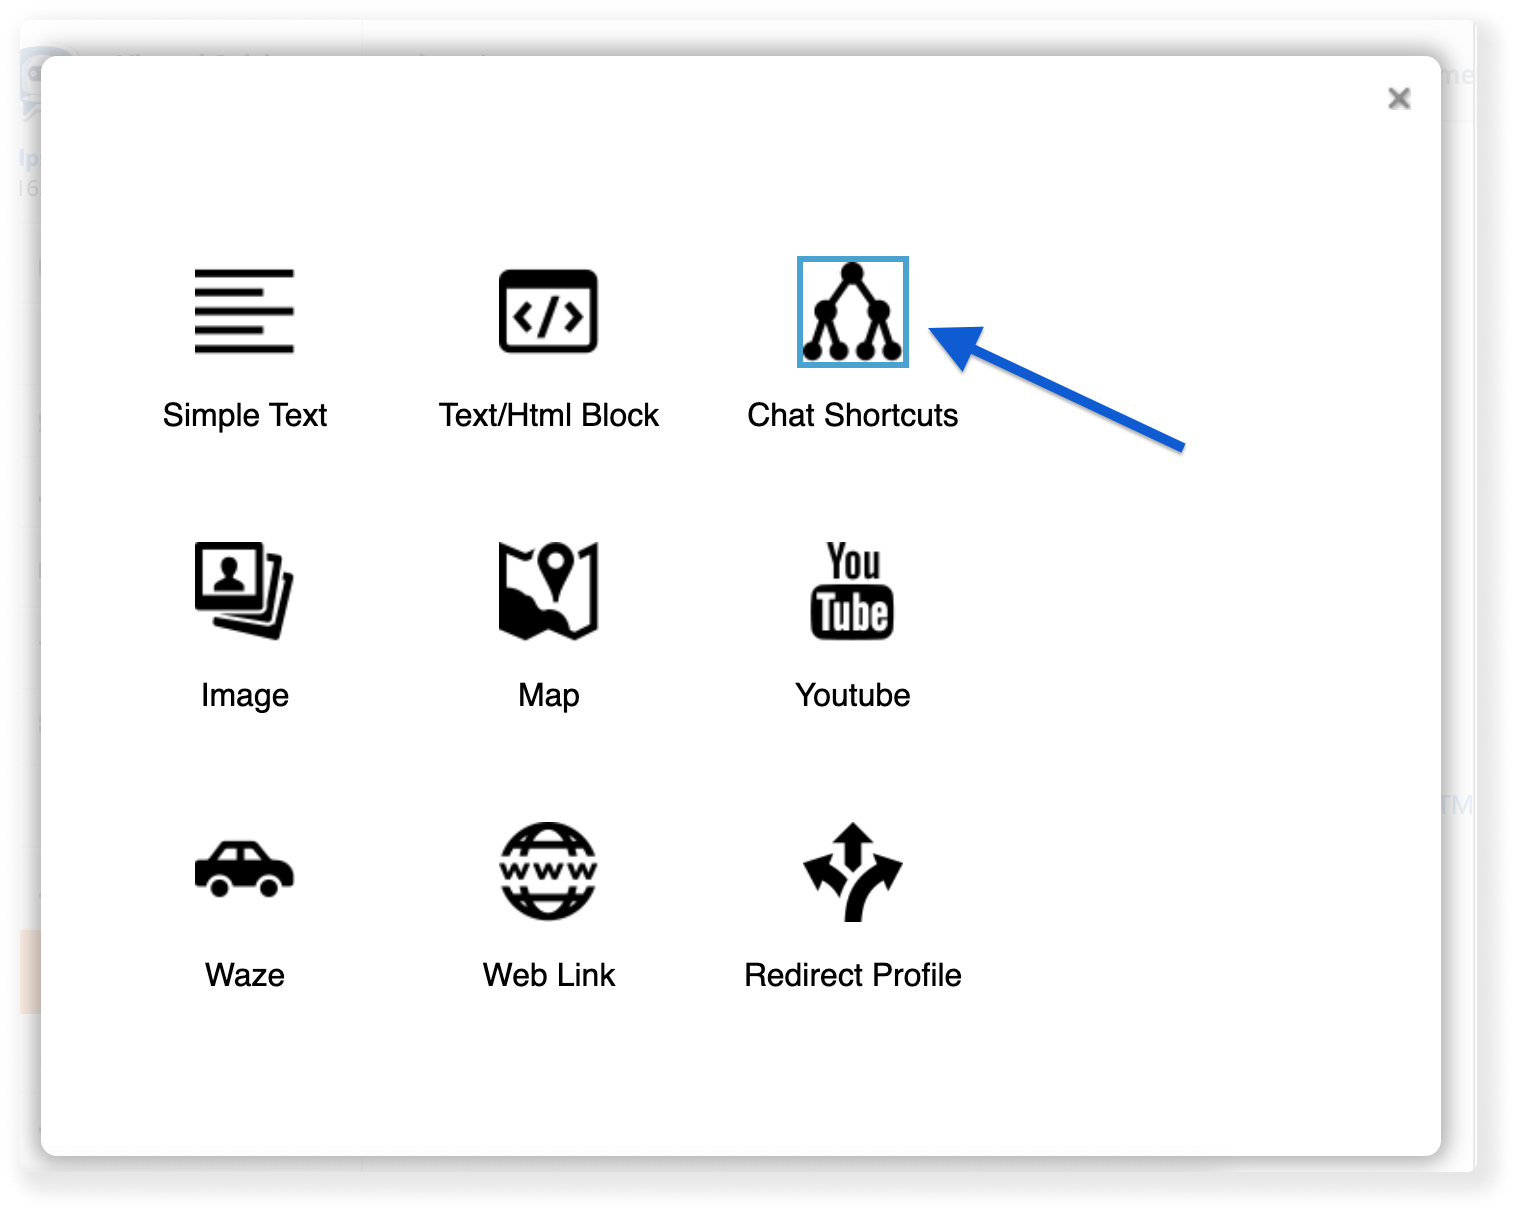
9. Press the “Chat Shortcuts” button on the top right corner
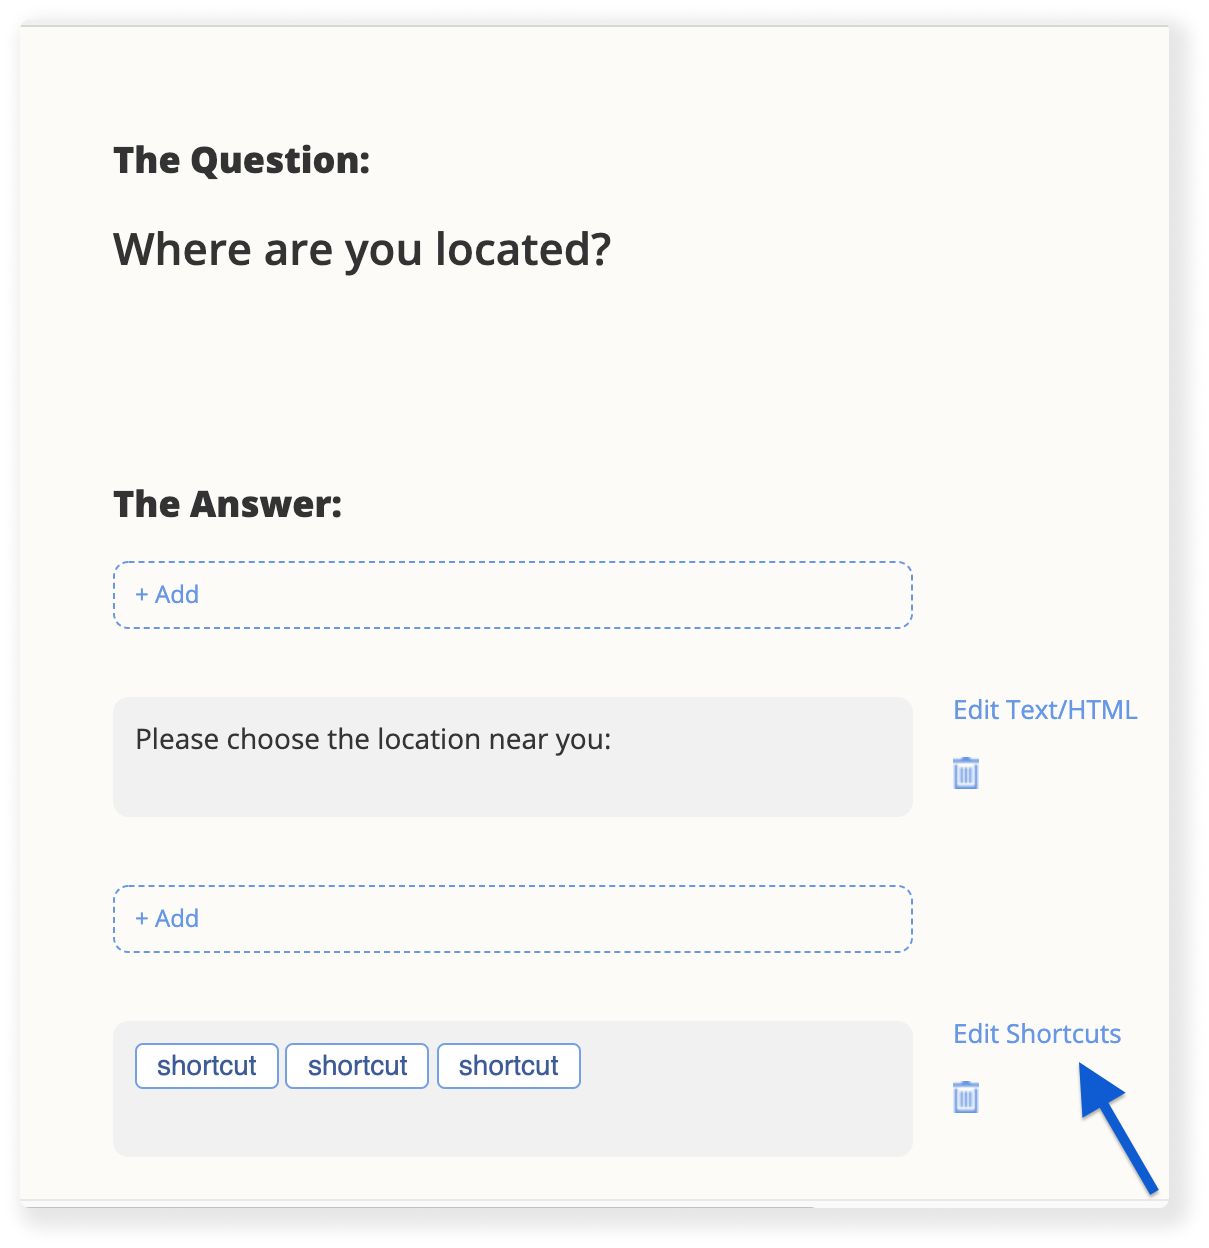
10. You’ll be directed back to the Q&A screen. Press the “Edit Shortcuts” button, next to the new block that appeared.
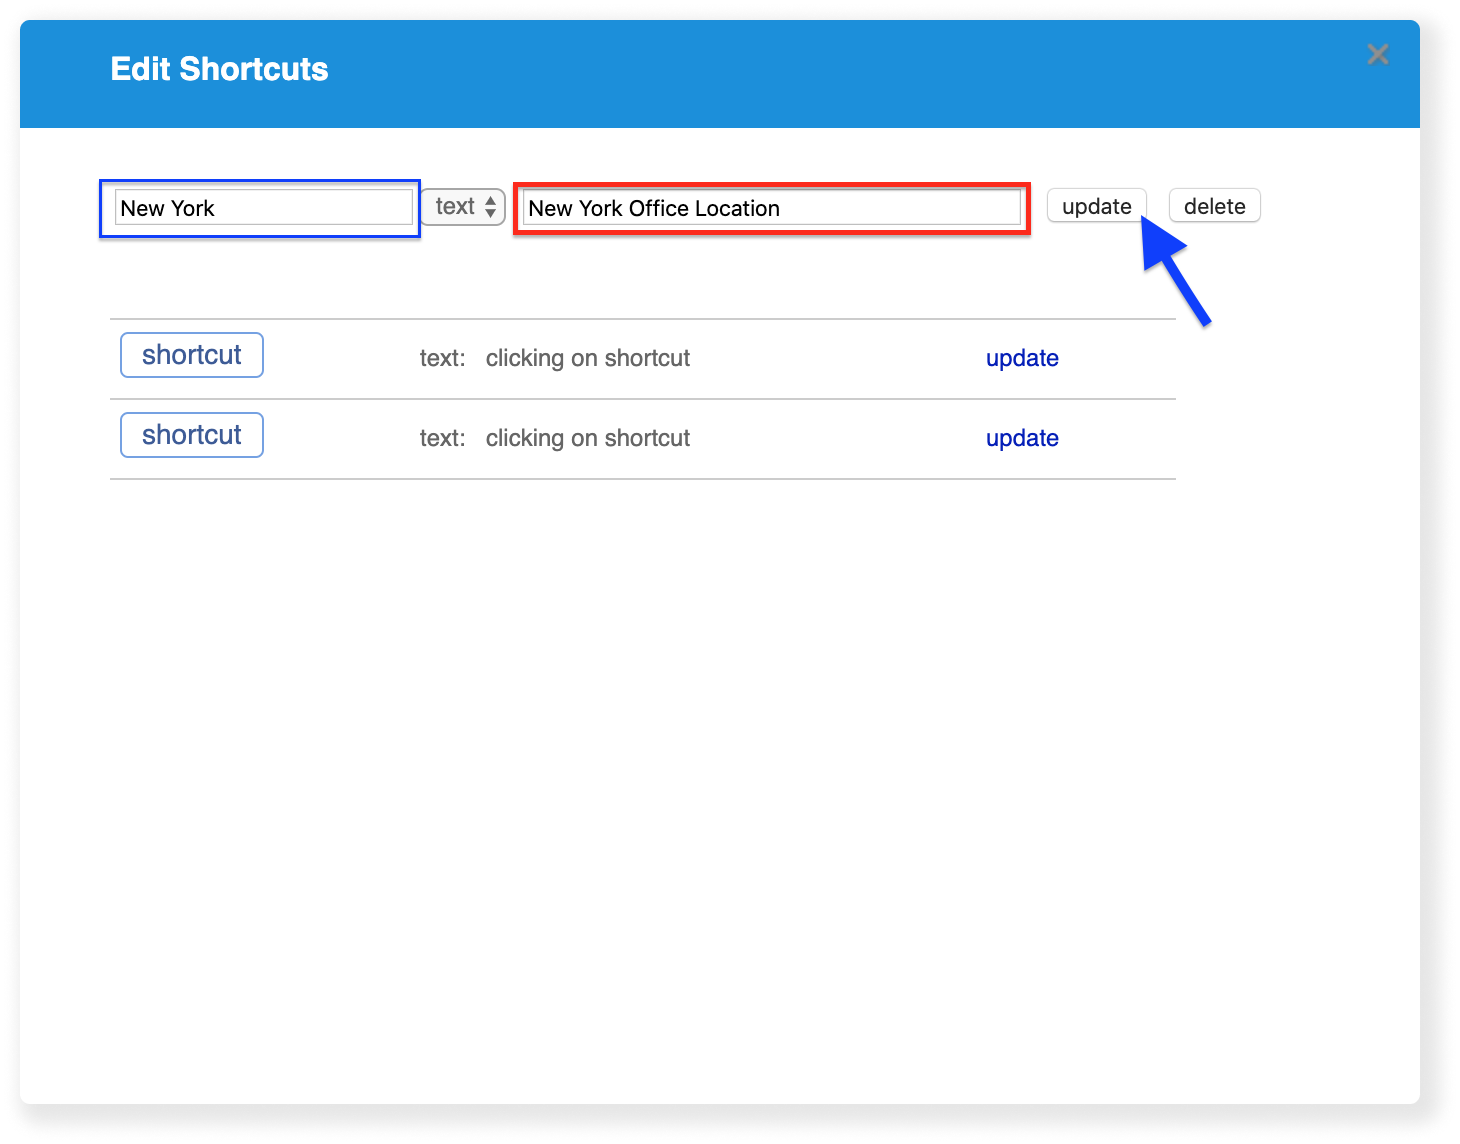
11. Click on the “Update” button to edit the shortcut as you like
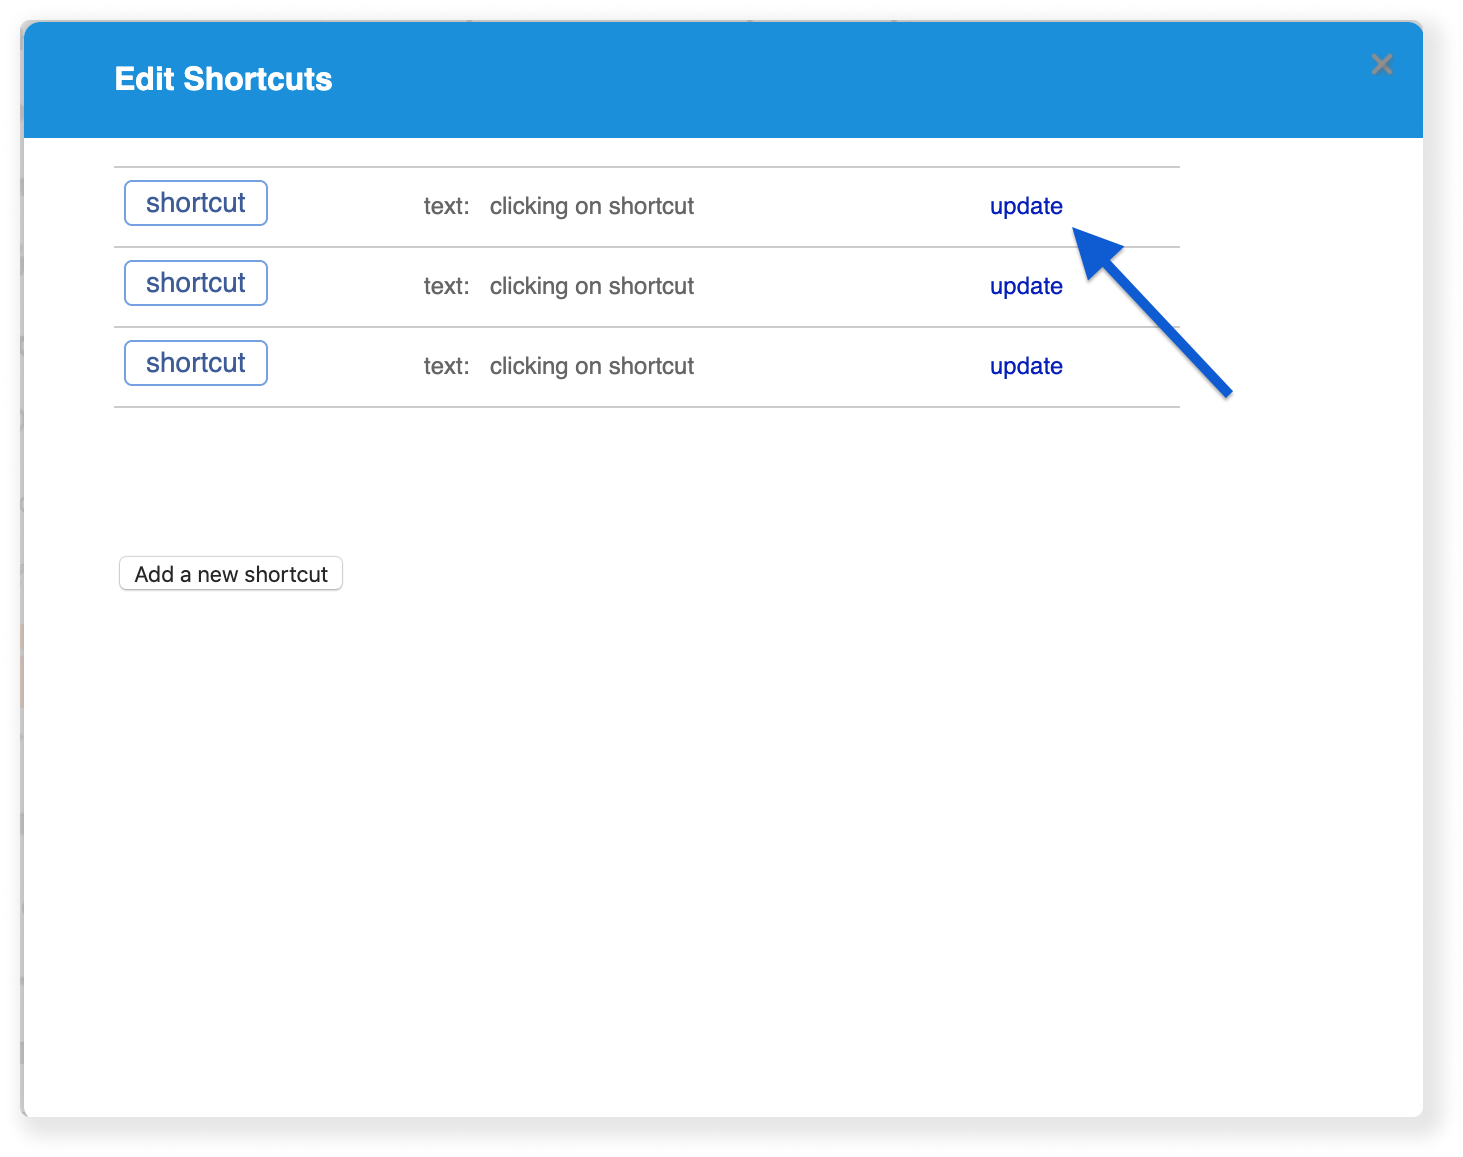
12. Edit the text in the first textbox (marked in blue) to change the text the visitor sees on the chatbot. Your shortcut triggers a follow-up question. To trigger a question by text (Hence, the question that the shortcut directs to, i.e “New York office location”), write your question in the textbox marked in red. When you’re done, press “Update”.
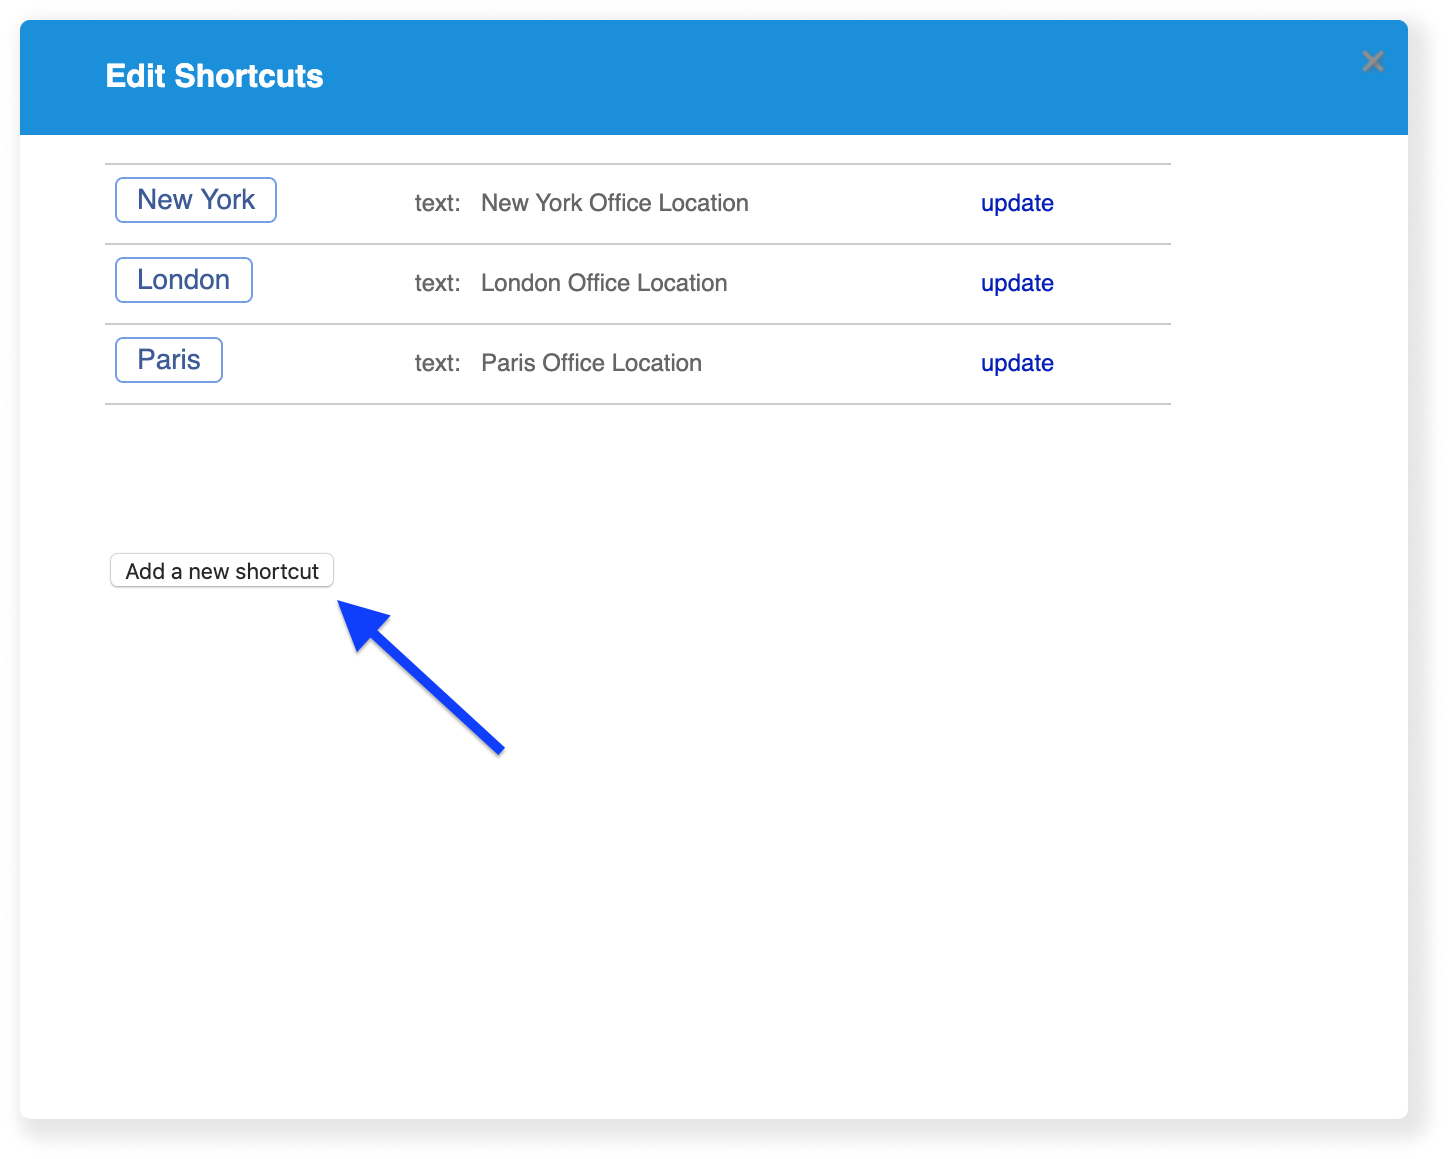
13. Do the same again for Paris and London locations.
14. Go back to the Q&A screen. Press ‘Next’ on the top of the page, and then ‘Finish’ on the bottom of the next page.
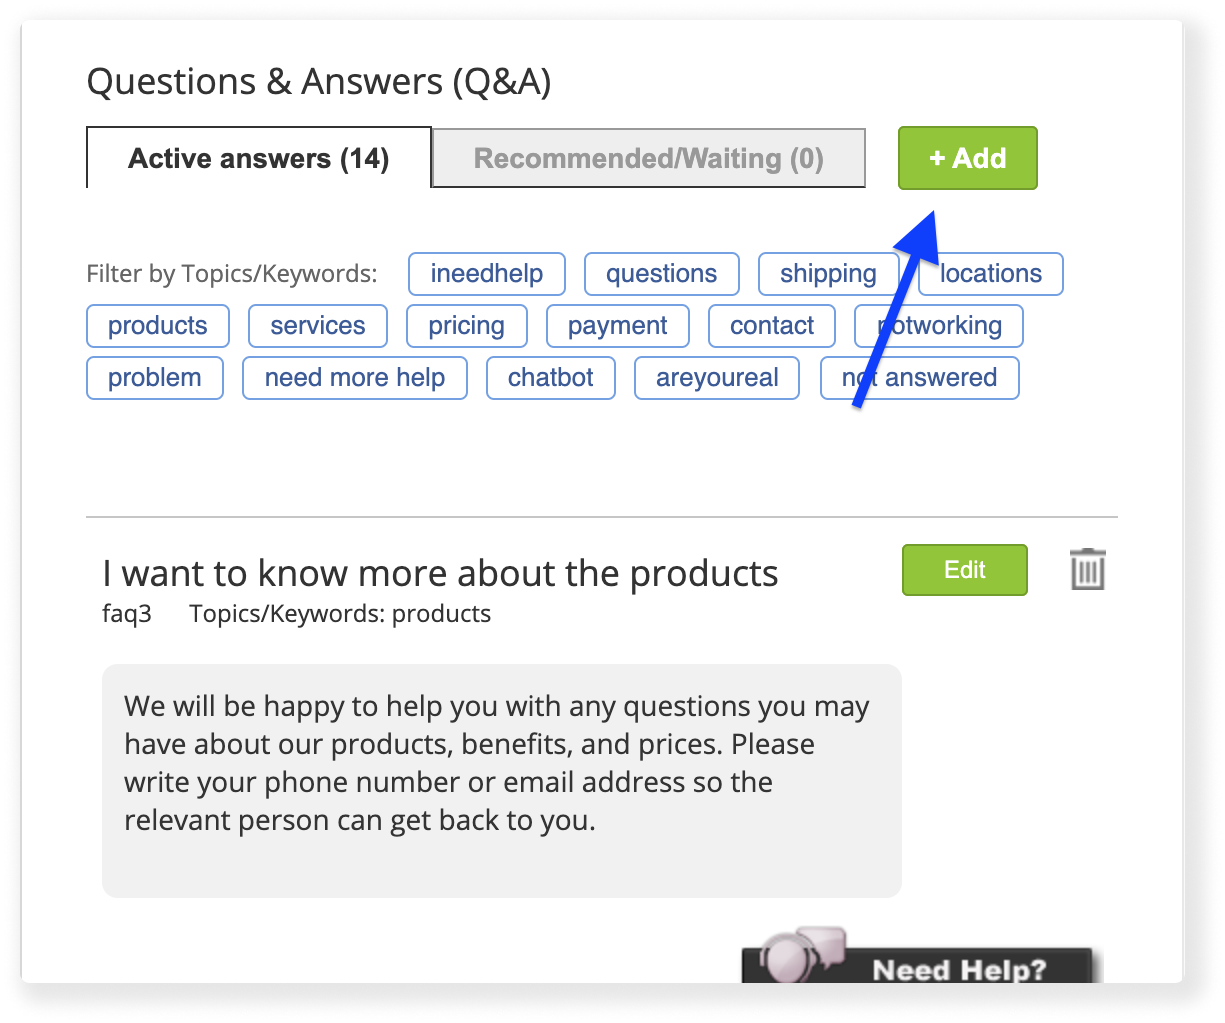
15. On the Questions & Answers Page, Create a new Question by pressing the green "+ Add" button on top.
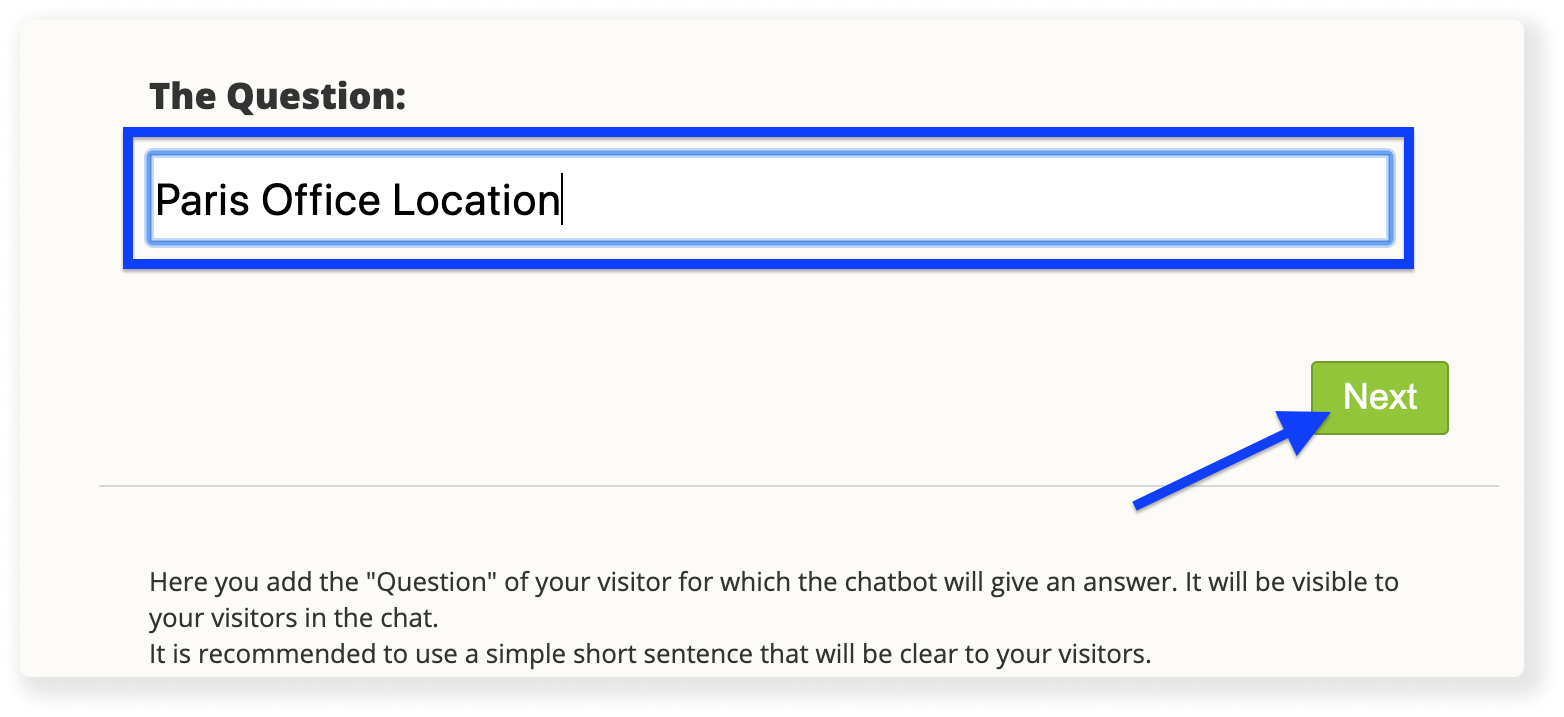
16. Fill in the textbox marked in blue with your new question - this should be the same text that you filled in the textbox that was marked in red in step #12. When You're done, press the 'Next' button.
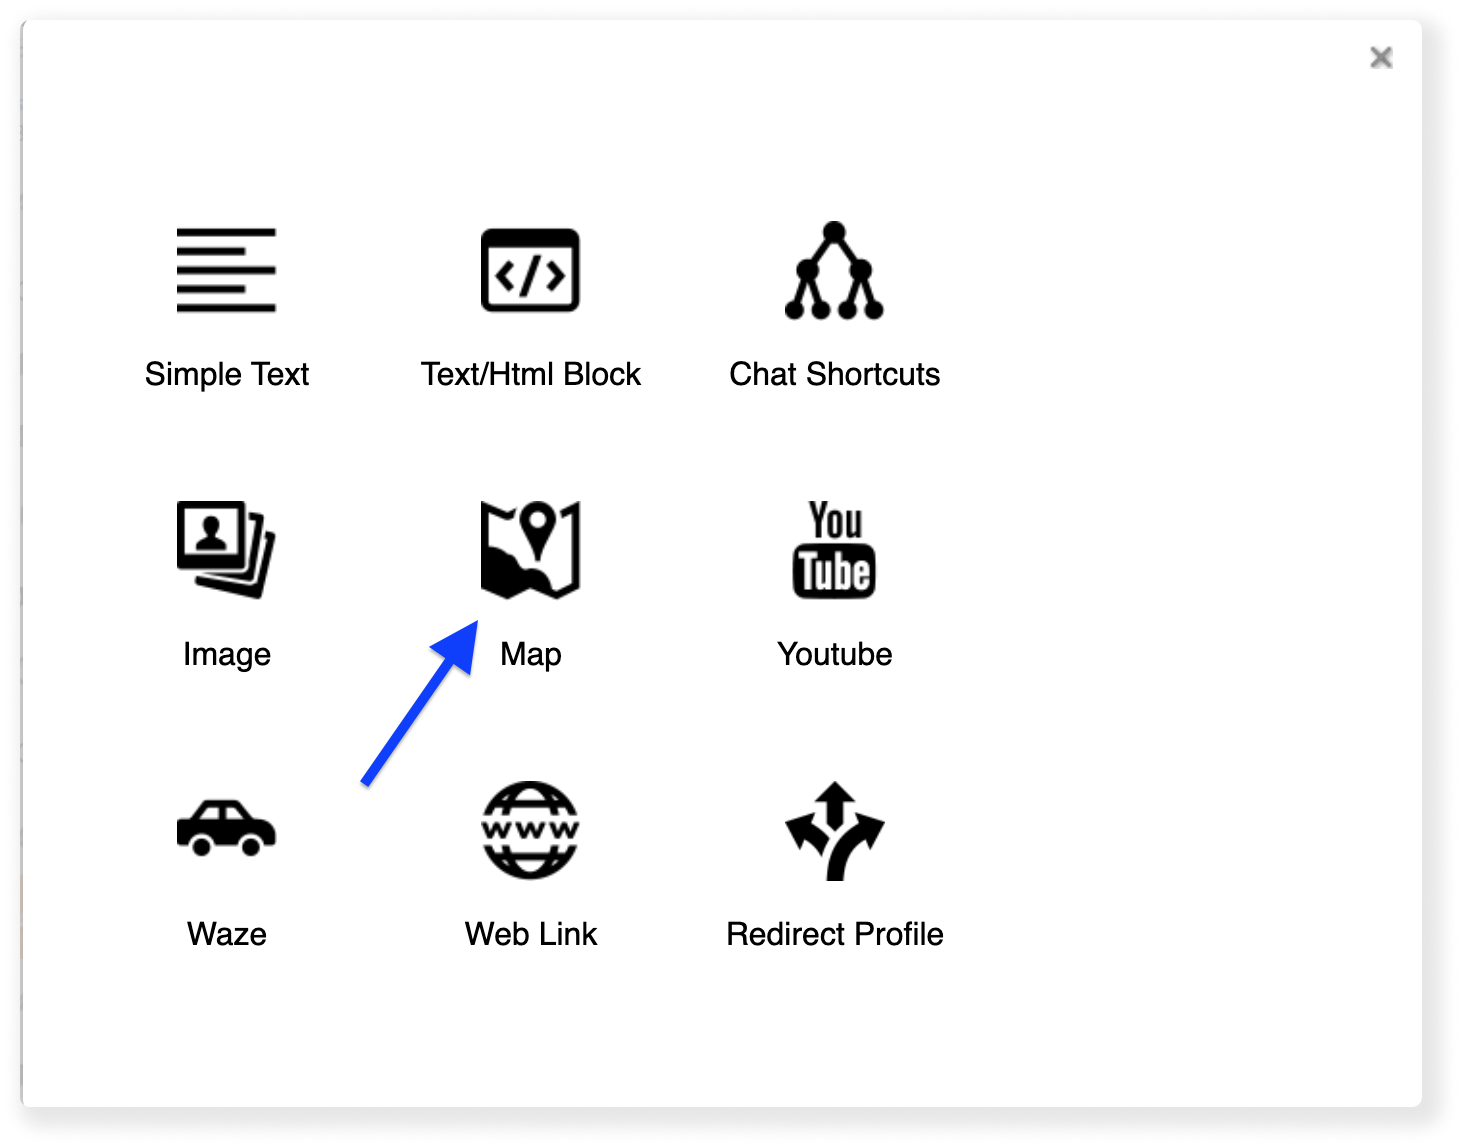
17. Under the title 'The Answer' press the green 'Edit' button. Afterwards, press the ' + Add' button. Press the 'Map' button in the next window.
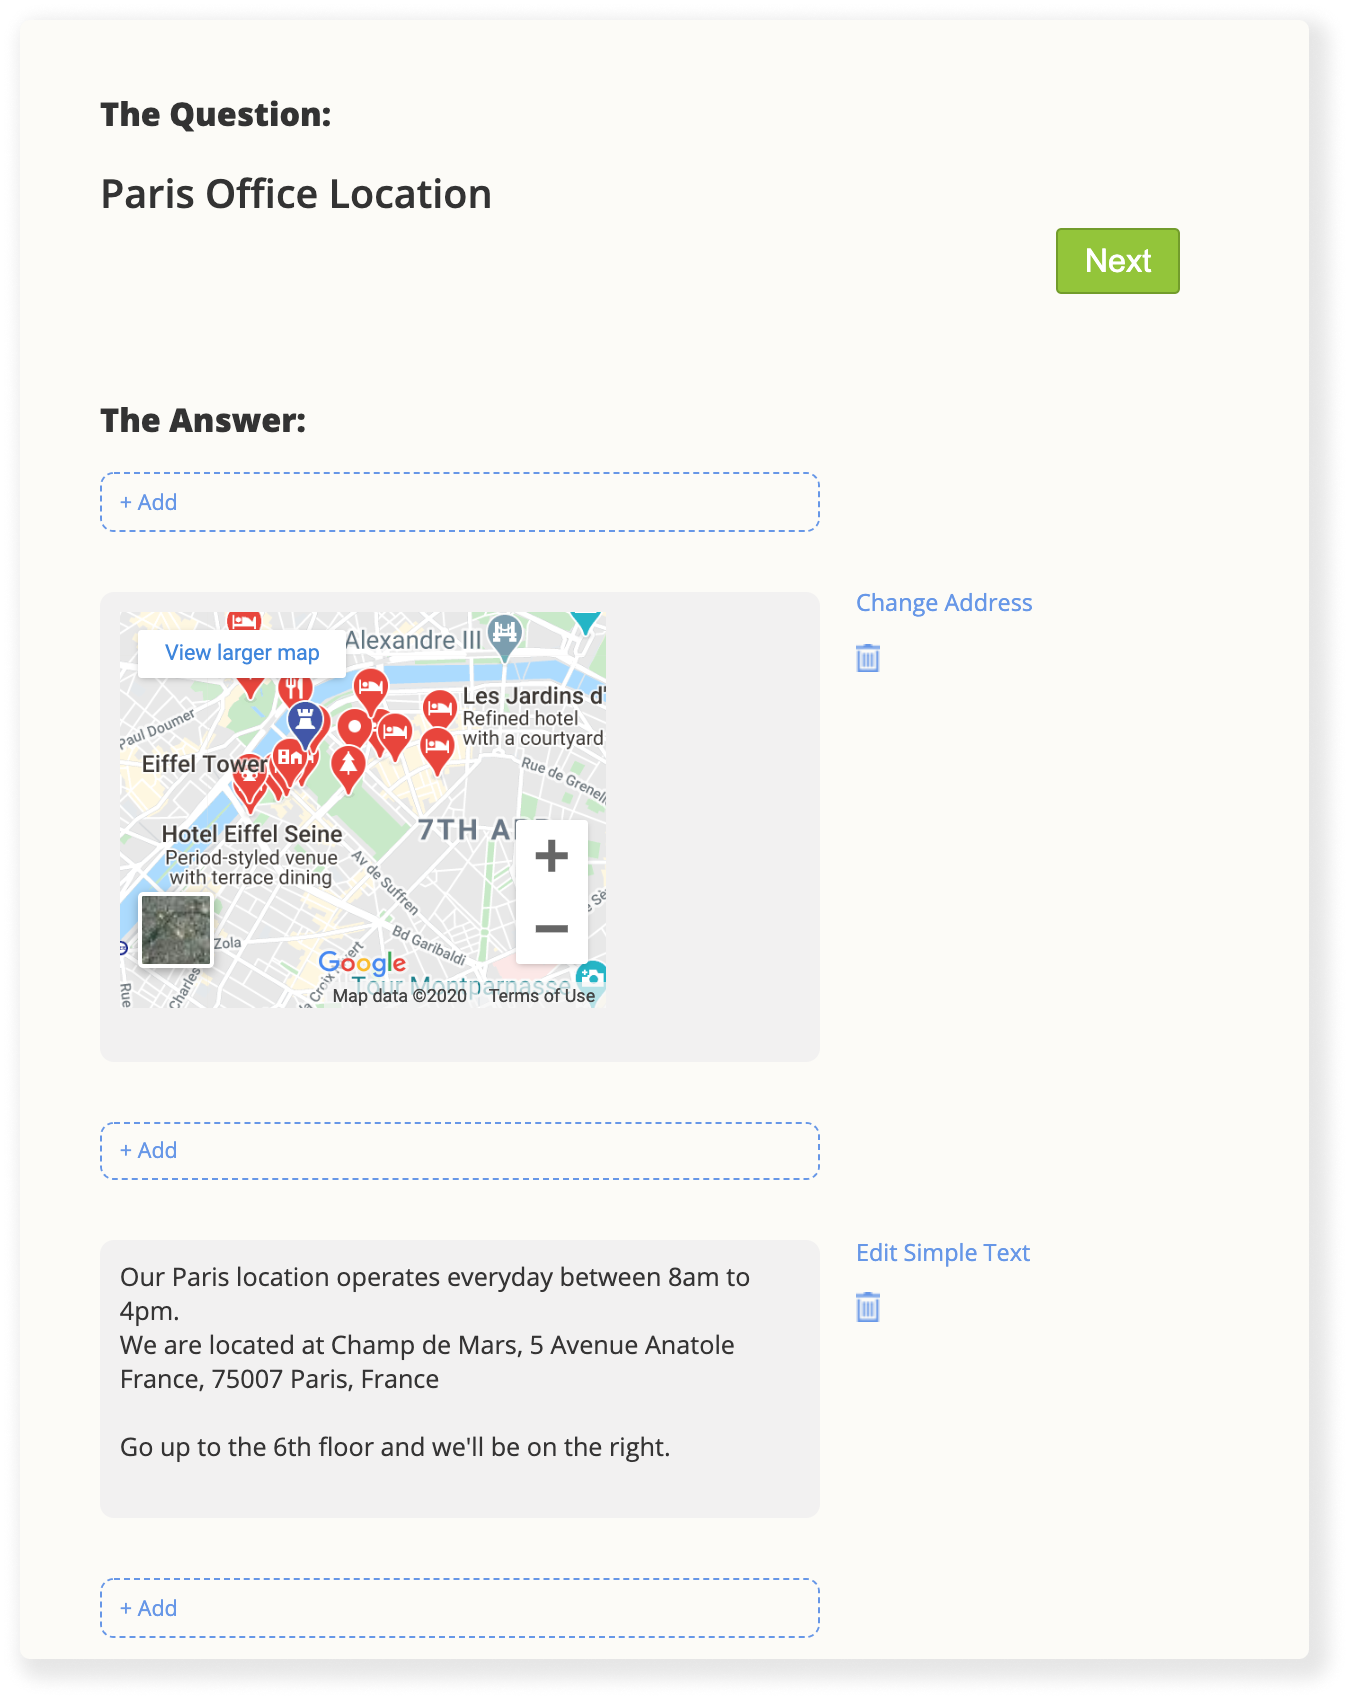
18. You can change the address of the location that is shown and also add another text paragraph with more information about this location, see the example below. When you're done, press 'Next' and proceed to the next page.
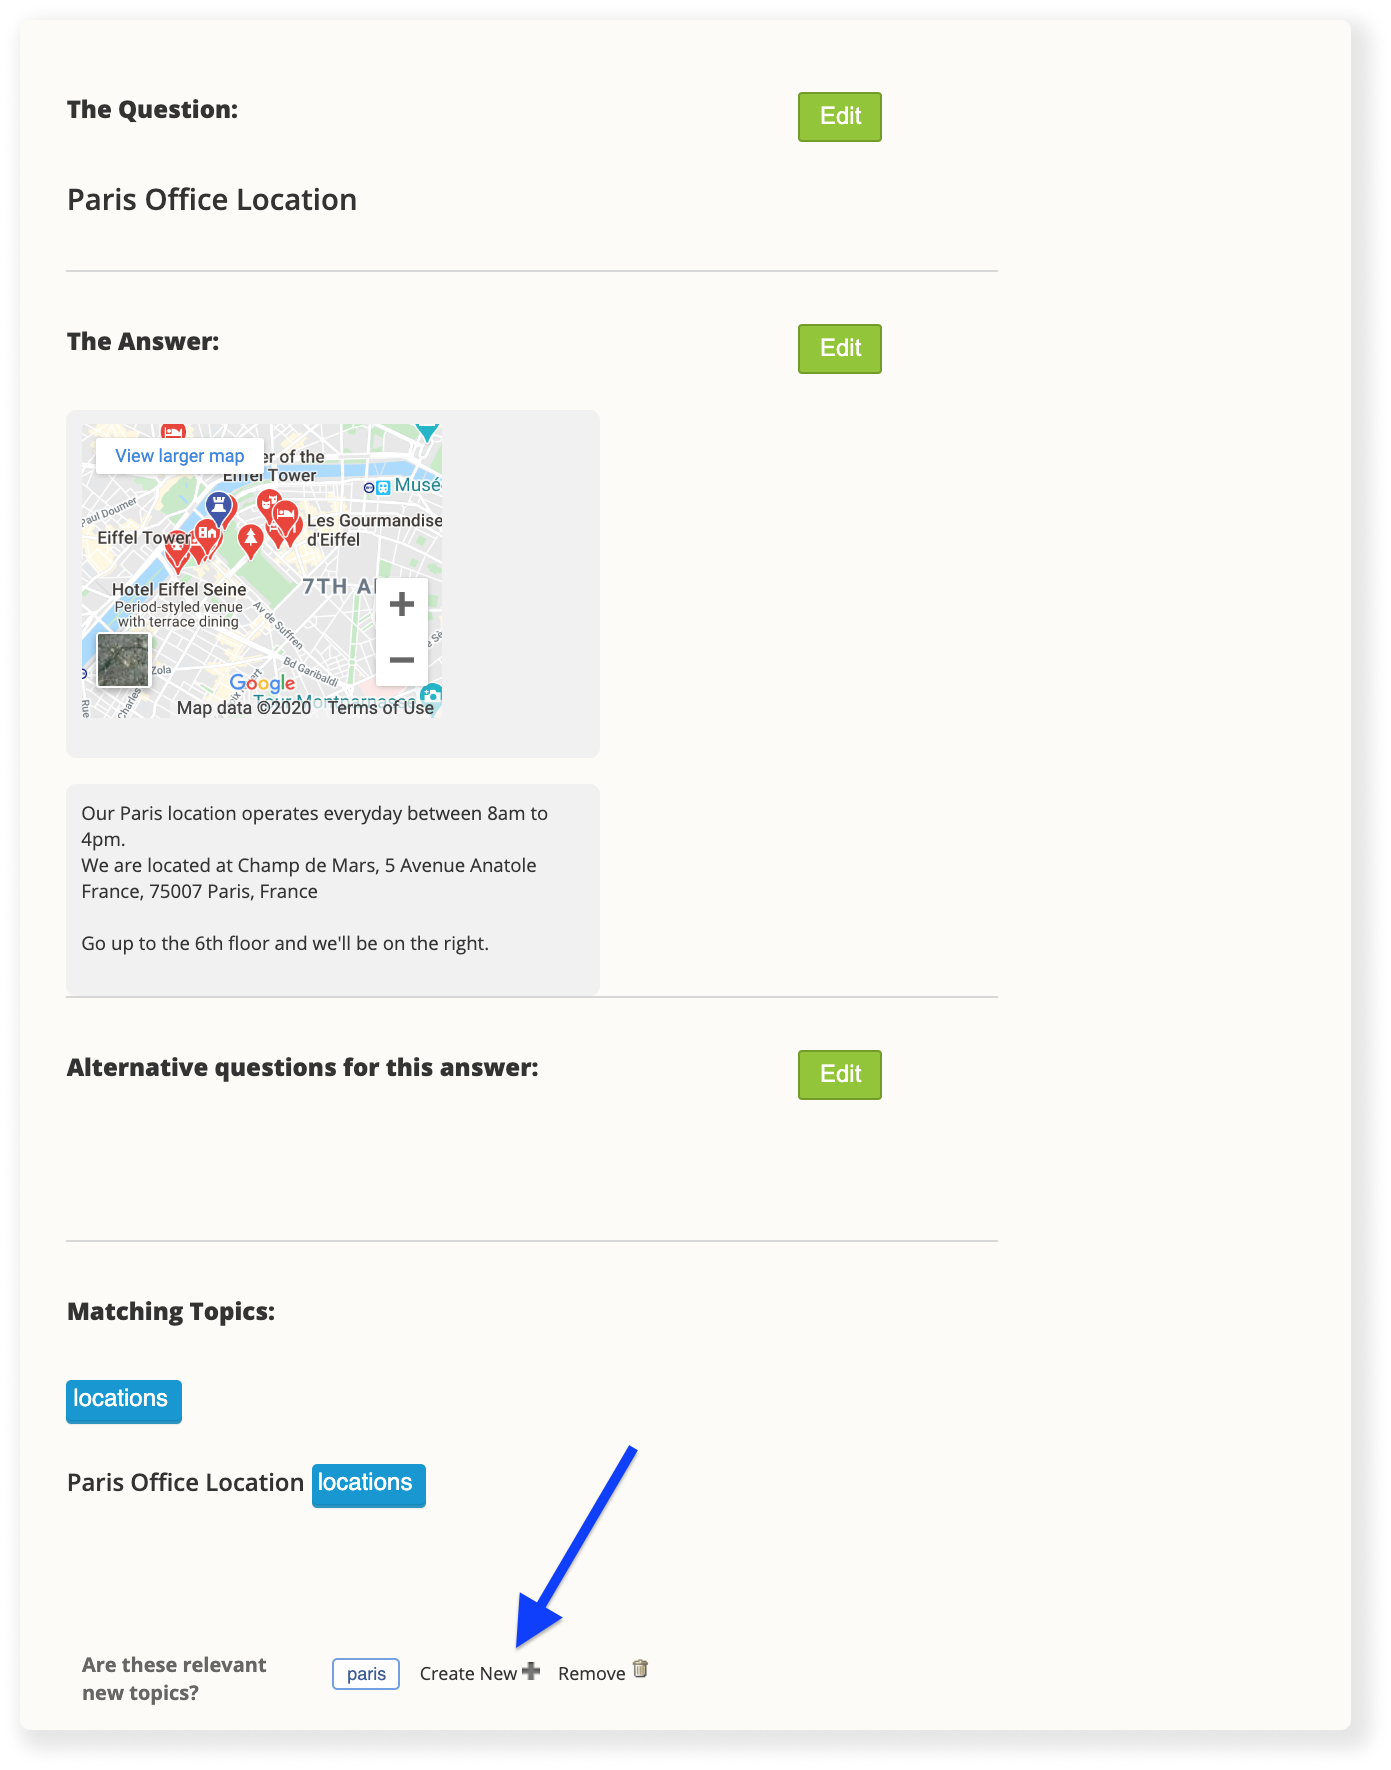
19. At the bottom of your page, Under 'Matching Topics' press the 'Create New' button next to either of the keywords suggested.
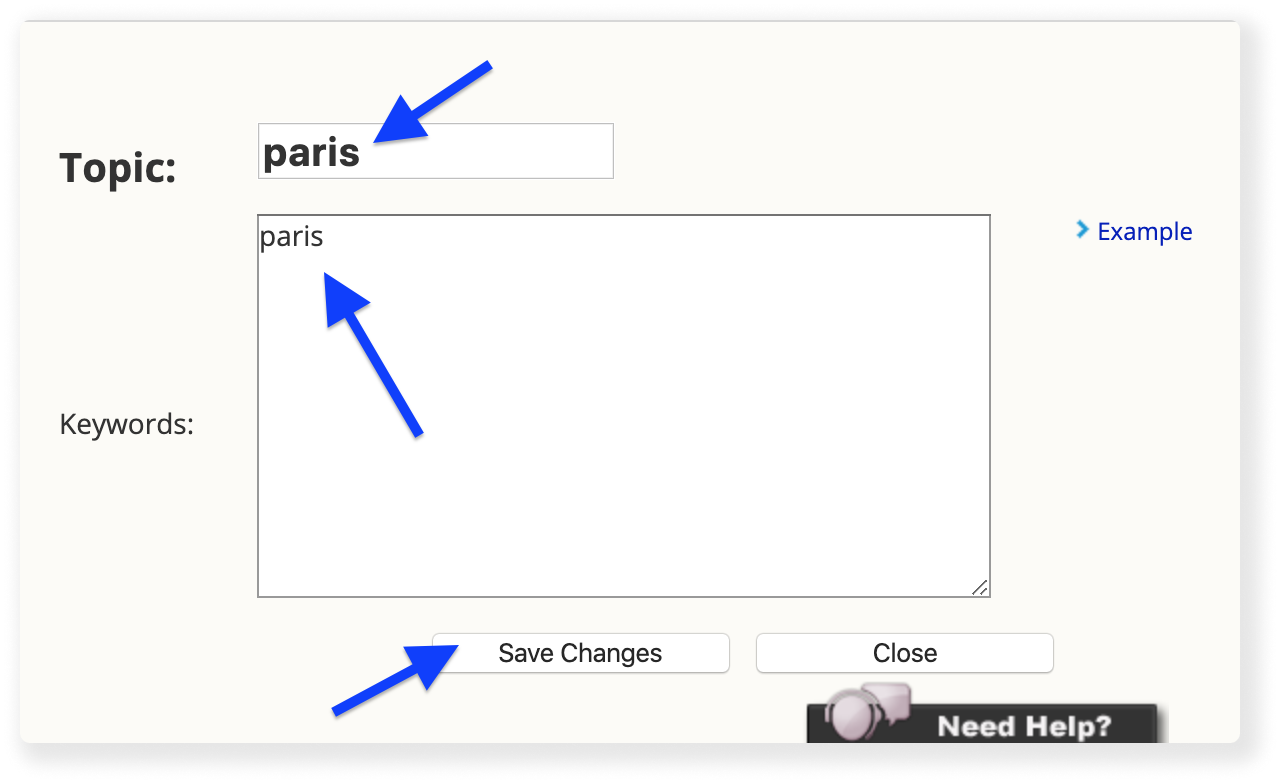
20. Edit Both the topic textbox and the keywords textbox with the word 'Paris'. When you're done, press 'Save Changes', and after the page reloads, press 'Close'. Press 'Finish' when the page goes back to the question view.
21. Repeat the process explained in steps 15-20 for each one of your locations (e.g. London, New York).