step-by-step: add a chatbot to GoDaddy site
Add the Chatbot to your GoDaddy site in a few simple steps.
note: You can find your VirtualSpirits Chatbot HTML code in the control panel under 'add to website'.Attention: Site wide scripts are not supported by GoDaddy’s latest website builder "GoCentral".Legacy GoDaddy Sites
1. Login to your GoDaddy admin panel.
2. Go to the WEBSITE BUILDER and click on Manage.
3. On the dashboard click on "Edit site".
4. In the top right menu open the menu by click on the ≡ icon, then select "Site Settings".
5. On the top menu select "Site-wide Code".
6. Copy & paste the Chatbot HTML code to the text box of Code to put before closing </BODY> tag (all pages)
7. Click "OK".
8. Publish your website by clicking to "Publish" button at the top right corner.
GoDaddy’s latest website builder "GoCentral"
The GoDaddy’s latest website builder "GoCentral" will allow adding a chat fixed within the layout, not as a floating element as supported in previous sites.
1. Login to your GoDaddy Website Builder admin panel.
2. Under the "SITE NAVIGATION", select the page where you would like the chatbot to appear.
3. Choose a prominent place where you would like the chatbot to appear and click on the "Add Section".
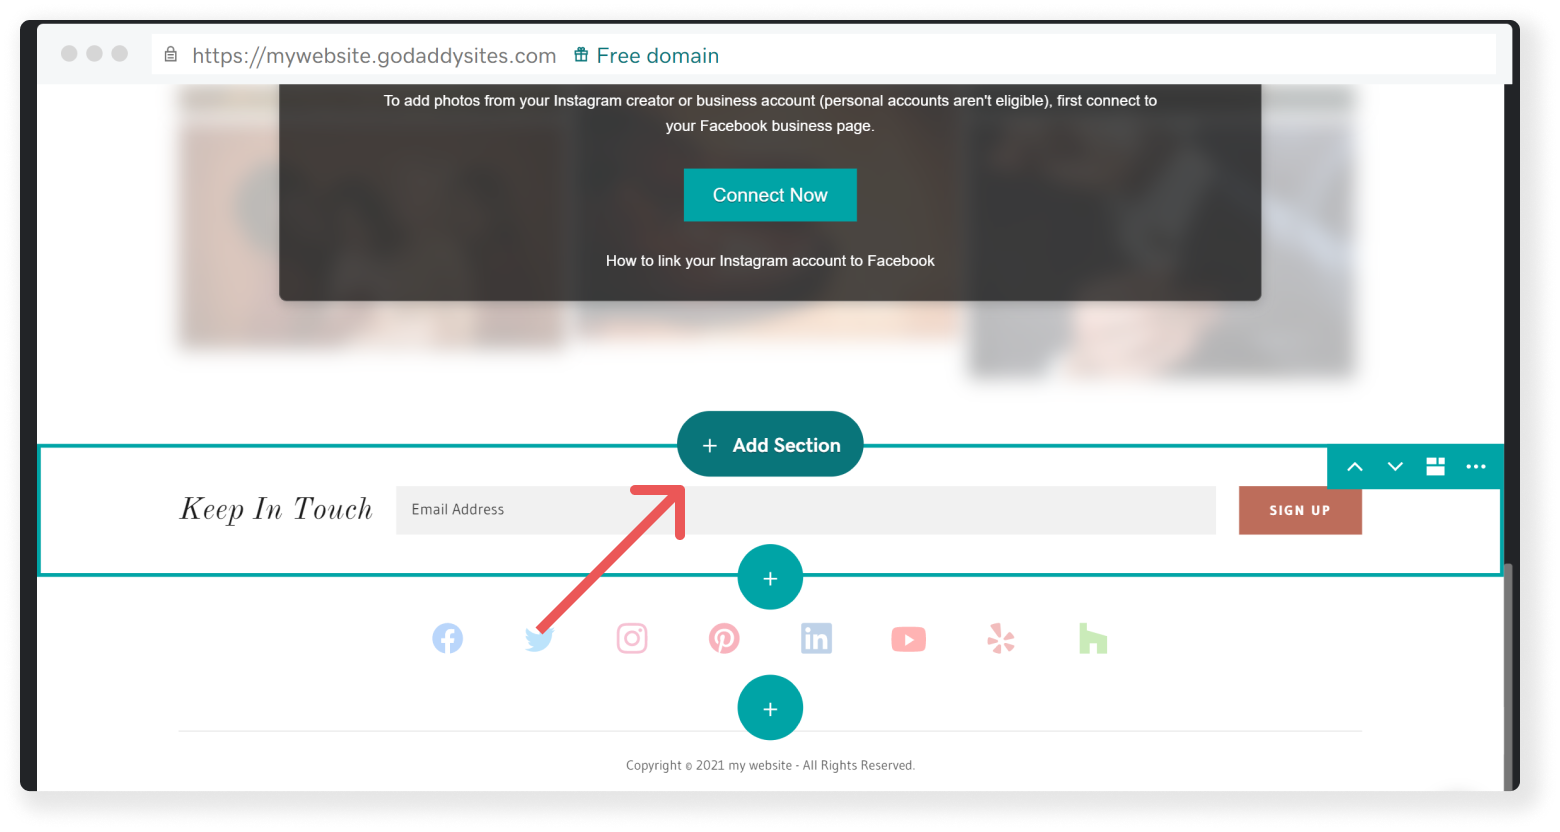
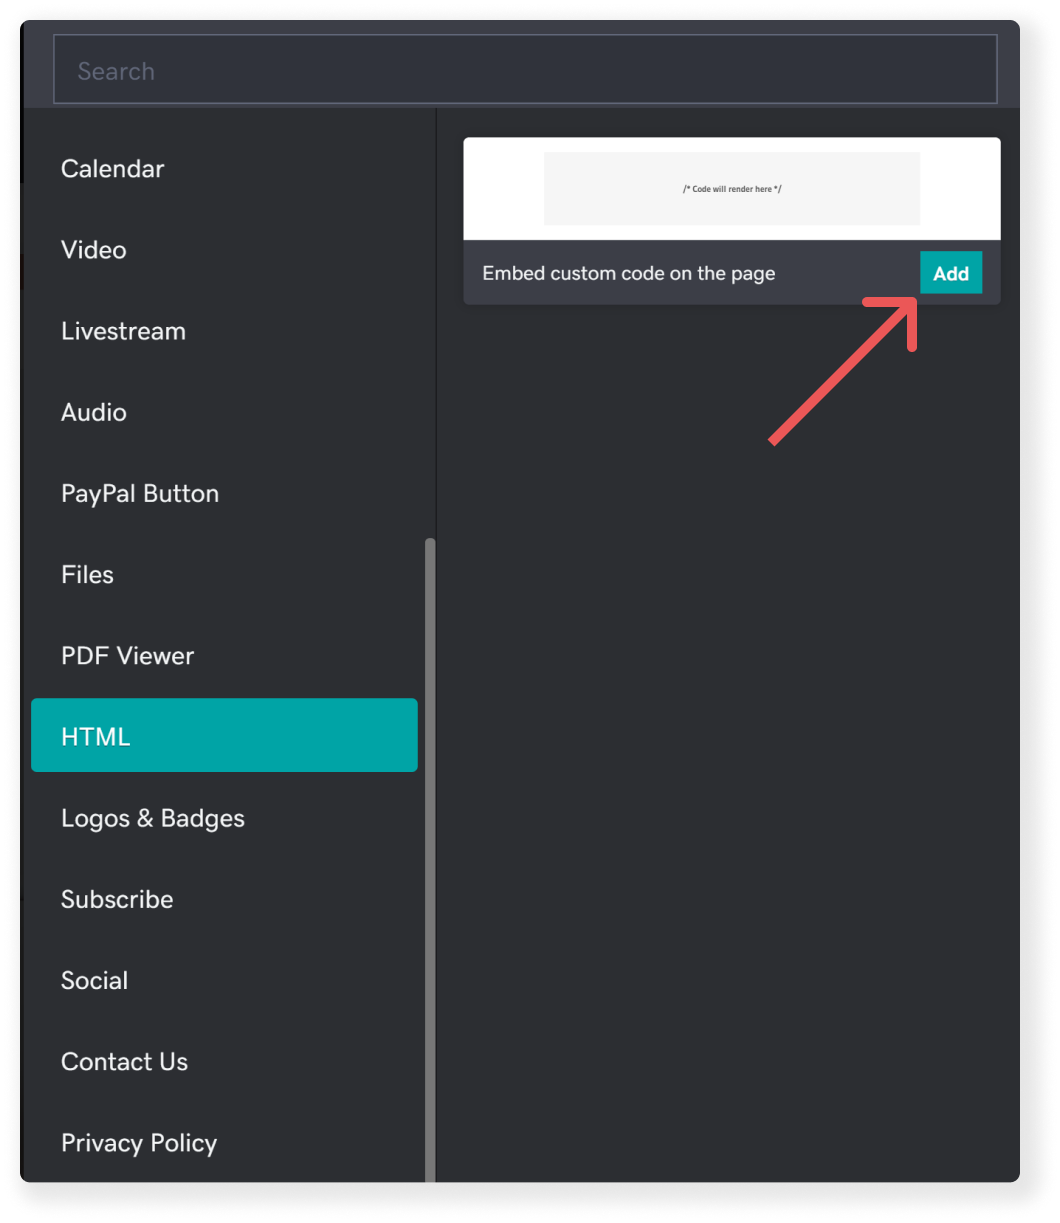
4. On Add Section select "HTML", and click on "Add"
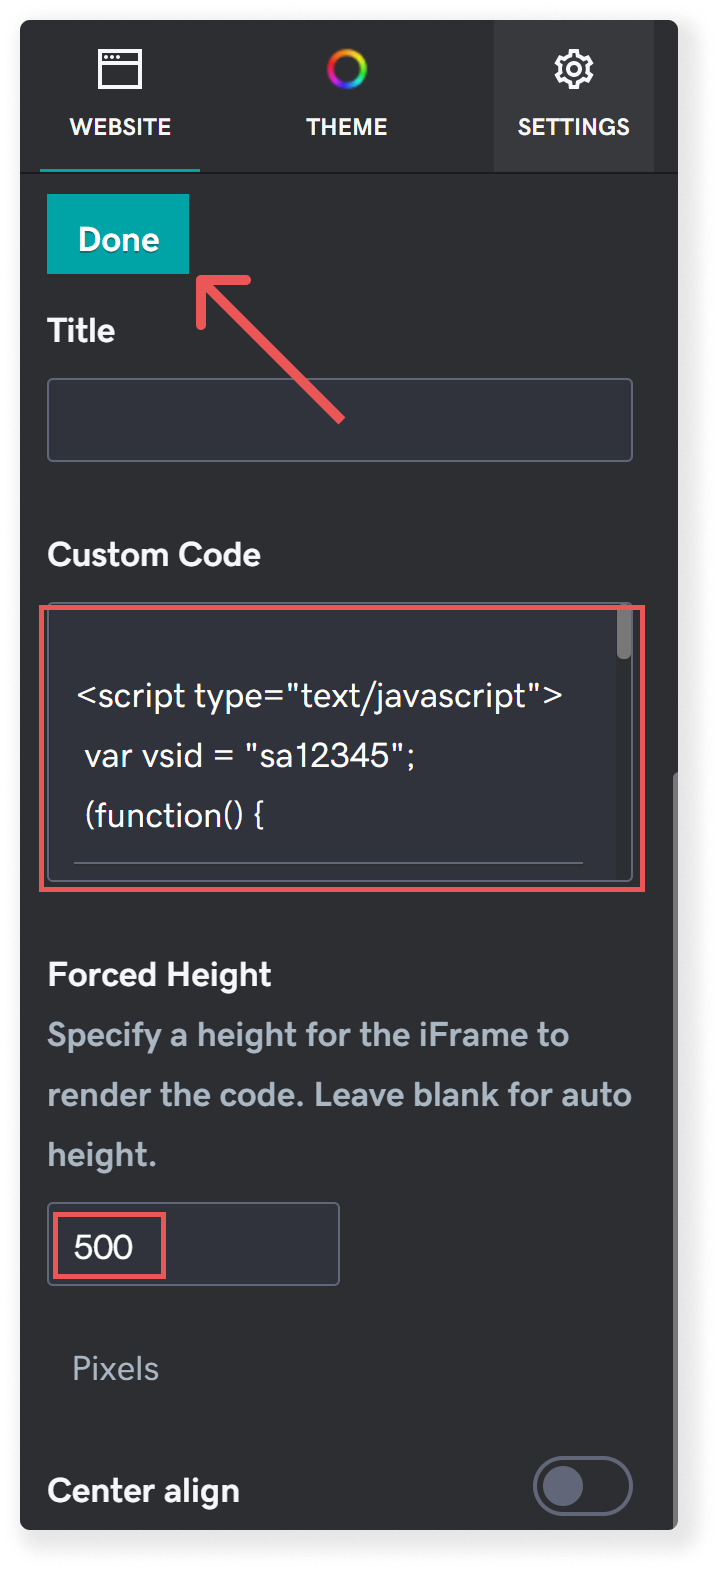
5. Copy & paste the Chatbot HTML code to the text box of "Custom Code", add Height of 500 to leave room in your layout for the chat window, and click on "Done".
6. Publish your site.
Note: Repeat steps 3-5 for each page you want the chatbot to appear on. GodDaddy removed the option to add code to all pages together.