step-by-step: adding google analytics and other tracking
Your Chatbot can be integrated with Analytics and tracking tools to count leads as events and conversions.
1. Login to your Chatbot account.
2. On the top menu bar, press the "Tools & Settings" button.
3. Inside "Tools & Settings" page, select "Analytics Tracking".
Three options are made available.
- Google Tag Manager Event
- Facebook Pixel Event
- Analytics Conversion Page aka "Thank You" page
Option 1: Google Tag Manager Event
If you are using Google Tag Manager on your site and you have GTM tracking codes installed in your page, you may use this option.
Each time a lead is generated the chatbot will send a GTM event called 'chatbotlead'.
Note: You need to configure this 'chatbotlead' as a "GTM customer trigger" inside Google Tag Manager (see (*)). 1. Under 'Google Tag Manager Event' turn Status to "ON" and press save changes.
2. Check out the change you made on your desktop website! Clear your browser cache history and then reload the website page.
3. Generate a lead inside your chatbot on your website, you'll see the 'chatbotlead' event appear immediately.
4. You can use any browser plugin 'Data Layer checker' to see the events are generated.
5. Once you create the "custom trigger" in GTM, you may open Google Analytics or GTM and view real time events.

(*) Configure this 'chatbotlead' as a "GTM customer trigger" inside Google Tag Manager:
The chatbot creates a custom event for GTM.
You can configure GTM to do whatever you want with it.
The basic configuration is the GTM customer trigger. This collects the information into GTM.
https://support.google.com/tagmanager/answer/7679219
Once you have the GTM customer trigger, you can for instance send data to Google Analytics. Here is an explanation of how to setup GA Event Tags
https://support.google.com/tagmanager/answer/13034206
Once you have the GTM customer trigger, you can also use it for Google Ads conversion. Here is an explanation of how to setup Tag Manager to deploy Google Ads conversion tags.
https://support.google.com/tagmanager/answer/6105160
Option 2: Facebook Pixel Event
If you are using Facebook Pixel on your site and you have Pixel tracking codes installed in your page, you may use this option.
Each time a lead is generated the chatbot will send a Facebook Pixel event called 'chatbotlead'.
You need to configure this event 'chatbotlead' inside Facebook in order to track it.
If you require a different kind of event contact our support team for help.
1. Under 'Facebook Pixel Event' turn Status to "ON" and press save changes.
2. Check out the change you made on your desktop website! Clear your browser cache history and then reload the website page.

How to Register and Track the Custom Event in Facebook Events Manager?
Check Facebook documentation.
Option A: Go to Meta Events Manager.
Select your Pixel.
Under the "Events" tab, you’ll see a list of tracked events.
Once your website starts sending the chatbotlead event at least once, it will appear automatically in the list of events.
Click on it to:
View diagnostics
Set it up for conversion tracking, if needed
Add it to a Custom Conversion (see below)
Option B: Create a Custom Conversion Based on chatbotlead
If you want to use the event for conversions in your campaigns:
In Events Manager, click Custom Conversions (left menu).
Click Create Custom Conversion.
Set the Data Source to your Pixel.
Choose Event = chatbotlead.
Optionally add filters based on parameters (e.g., source = Chatbot).
Give it a name like "Chatbot Lead".
Save.
After that, you can use this conversion in your Facebook ad campaign goals, retargeting, or tracking.
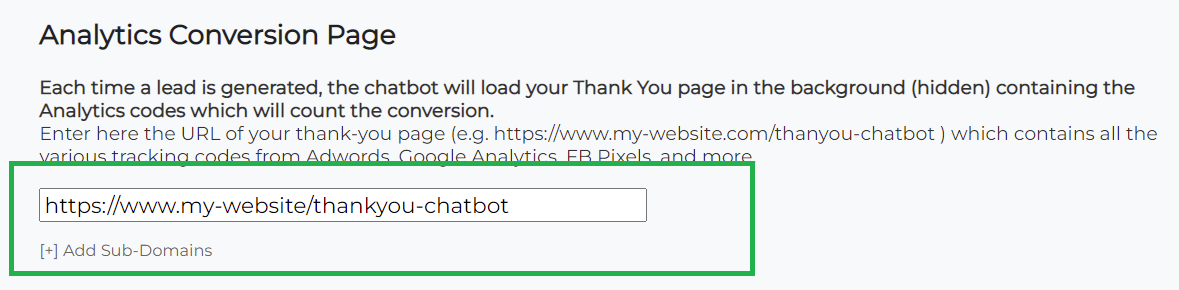
Option 3: Analytics Conversion Page aka "Thank You" page
Each time a lead is generated, the chatbot will load your Thank You page in the background (hidden) containing the Analytics codes which will count the conversion.
Enter here the URL of your thank-you page (e.g. https://www.my-website.com/thankyou-chatbot ) which contains all the various tracking codes from Adwords, Google Analytics, FB Pixels, and more.
1. Follow the instructions below to create your thank you page.
2. Copy the thank you page URL and paste it in the text box.
3. Press "Save changes".
Instructions to create your thank you page with Analytics, Adwords, FB pixel and other tracking
Step 1. Create Thank You page for your Chatbot.
The first step for the end-to-end solution is for you to create a thank you page on your domain that will be used by the Chatbot whenever a lead is generated in order to track this conversion.
Every time a lead is generated, the chat will load your Thank You page in the background containing the Analytics codes and other tracking codes needed to create count the conversion.
For example, a thank you page URL should look like this
https://www.mywebsite.com/thankyouchatbotThe HTML code of that page should contain the following:
- Add Google Analytics code based on analytics.js or tagmanager (for optimal solution do not use the older ga.js code)
- Add Google Adwords conversion code created specifically to track the leads of Chatbot
- Add Facebook conversion pixel code created specifically to track the leads of Chatbot
- Add other tracking codes created to track the leads of Chatbot
- Avoid any other content to keep this page light and remove codes of Chatbot inside that page as well
Step 2. Add the URL of your page in Settings.
Login to the Chatbot control panel and add the URL of your thank you page
- On the top menu bar, press the "Tools & Settings" button
- Inside "Tools & Settings" page, select "Analytics Integration".
- Paste the URL https://www.mywebsite.com/thankyouchatbot.
Note: If your website is still using only HTTP then your thank you page must also be HTTP. In that case past the URL http://www.mywebsite.com/thankyouchatbotNote: Make sure you pasted the entire correct URL! Look out of relative paths or any missing parameters or values.Step 3. Verifying Result in Real Time
Now, to make sure everything has been done correctly, your thank you page loads successfully and the tracking codes are all read, follow this procedure to make sure that you entered the correct URL and there are no more problems with executing the code added. Since this process isn’t visual and happens in the background, use traffic analyzers to check this part:
1. Launch your preferred traffic analyzer. Two popular options we suggest are: "Chrome built-in developer tools" and Chrome add-on “Google Analytics Debugger”
2. Refresh your website on your browser
3. Open the chatbot on your website and enter your contact details in to generate a lead
4. Check the logs of your analyzer to see that the thank you page is being loaded, followed by the code you entered in.
5. Repeat this step several times to make sure that everything works well
Step 4. Google Analytics Settings
You will have to make sure you have the following configuration inside your Google Analytics based on analytics.js code or tagmanager (for optimal solution do not use the older ga.js code)
Once you do these steps, you will get a clean set of Analytics from the source (e.g. adwords, organic, referral etc) through the website funnel all the way to the goal page. This is the reason only our chat should use this URL as conversion, because if all is done correctly you will NOT see virtualspirits.com in referral or inside any funnels!
1. Add a page view "Goal" like "Chatbot Lead" on URL.
- Go to Admin
- Click Goals
- Click +New Goal
- Goal Setup choose which option suits you, for instance Template>Contact Us,
- Goal description give it name and choose "Destination" Destination
- Goal Details use "Regular Expression" to match the word in the URL of the thank you page for instance
thankyouchatbot in case you created a page
https://www.mywebsite.com/thankyouchatbot2. Add a page "Referral Exclusion List".
- Go to Admin
- Click Tracking Info
- Choose "Referral Exclusion List"
- Click +Add Referral Exclusion
- Add the following 2 domains:
www.virtualspirits.comvirtualspirits.com3. Test the settings. In order to see that your configuration in Google Analytics is correct you may use Google Analytic's "Real-Time". When you visit your newly created thank you page you need to see the "goal" being counted in "Real-time" section.
In addition, if you did not add virtualspirits.com to "Referral Exclusion List" then shows top-referrals will show virtualspirits.com. Once you add virtualspirits.com to the "Referral Exclusion List" the "Real-time" section will no longer show this domain top-referrals for new leads.
Note: changes in Google Analytics do not change historical data. So if you have just updated the "Referral Exclusion List" you will need to wait 24 hours in order for measures to exclude the referral domain. Historical data will still show measures that include virtualspirits.com but the new data will not.
Step 5. Google Adwords Conversion in End-to-End Solution
The optimal approach to take care of Google Adwords conversion is to link your Google Analytics account with your Adwords account. If you have also setup the analytics as explained in step 4, then you will have the end-to-end visibility of the traffic sources (organic/paid) all the way to conversion.
If you're setting up Adwords conversion codes that you wish to track separately, the "conversion" must be specific to Chatbot.
If necessary you will have to create a new conversion and add it to the dedicated thank you page of step (1) https://www.mywebsite.com/thankyouchatbot
When you're looking at the reports inside Google Adwords alone do not get confused between unique conversions, converted clicks and the number of conversions you expect to see. The total number of conversions is the one you see in Adwords panel "Tools">"Conversions".
This is confusing to many people since inside the "campaign reports" that most people use you tend to see converted clicks that count several conversions as one.
Note: This is why we recommend as optimal approach to link your Google Analytics account with your Adwords account.
Step 6. Other Tracking
Using tracking solutions of other tools and service providers works mostly the same. The safest solution usually is adding the tracking code to your own domain's page you created for this purpose (which, as mentioned before, should look like this
https://www.mywebsite.com/thankyouchatbot). you can check if the tracking code was loaded properly by using the step (3) traffic analyzers
Step 7. Tracking on Multiple Domains (Cross domains)
If you are using the same chatbot on multiple websites with each having its own domain (e.g. www.websiteABC.com, www.websiteXYZ.com), you’ll have to find a solution to track your conversions across different domains ("cross domain").
You will need to create a "thank you" page for the chat for each domain separately. If you encounter any problem, please let us know and we will help you add them to the chat so you can track your conversions.
Step 8. Mobile vs Desktop statistics (Segments)
You can easily split Google analytics reports using 'segments' to accurately see traffic by device ("Desktop", "Mobile", etc.).
However this method relies on you using a single domain for all your traffic. If you are using a subdomain for your mobile traffic such as "m.mywebsite.com" then you would need a "cross domain" solution as explain previously on Step 7.
You will need to create a "thank you" page for the chat for the subdomain separately. If you encounter any problem, please let us know and we will help you add them to the chat so you can track your conversions.