step-by-step: add a chatbot to site with Google Tag Manager
Add the Chatbot to your site with Google Tag Manager in a few simple steps.
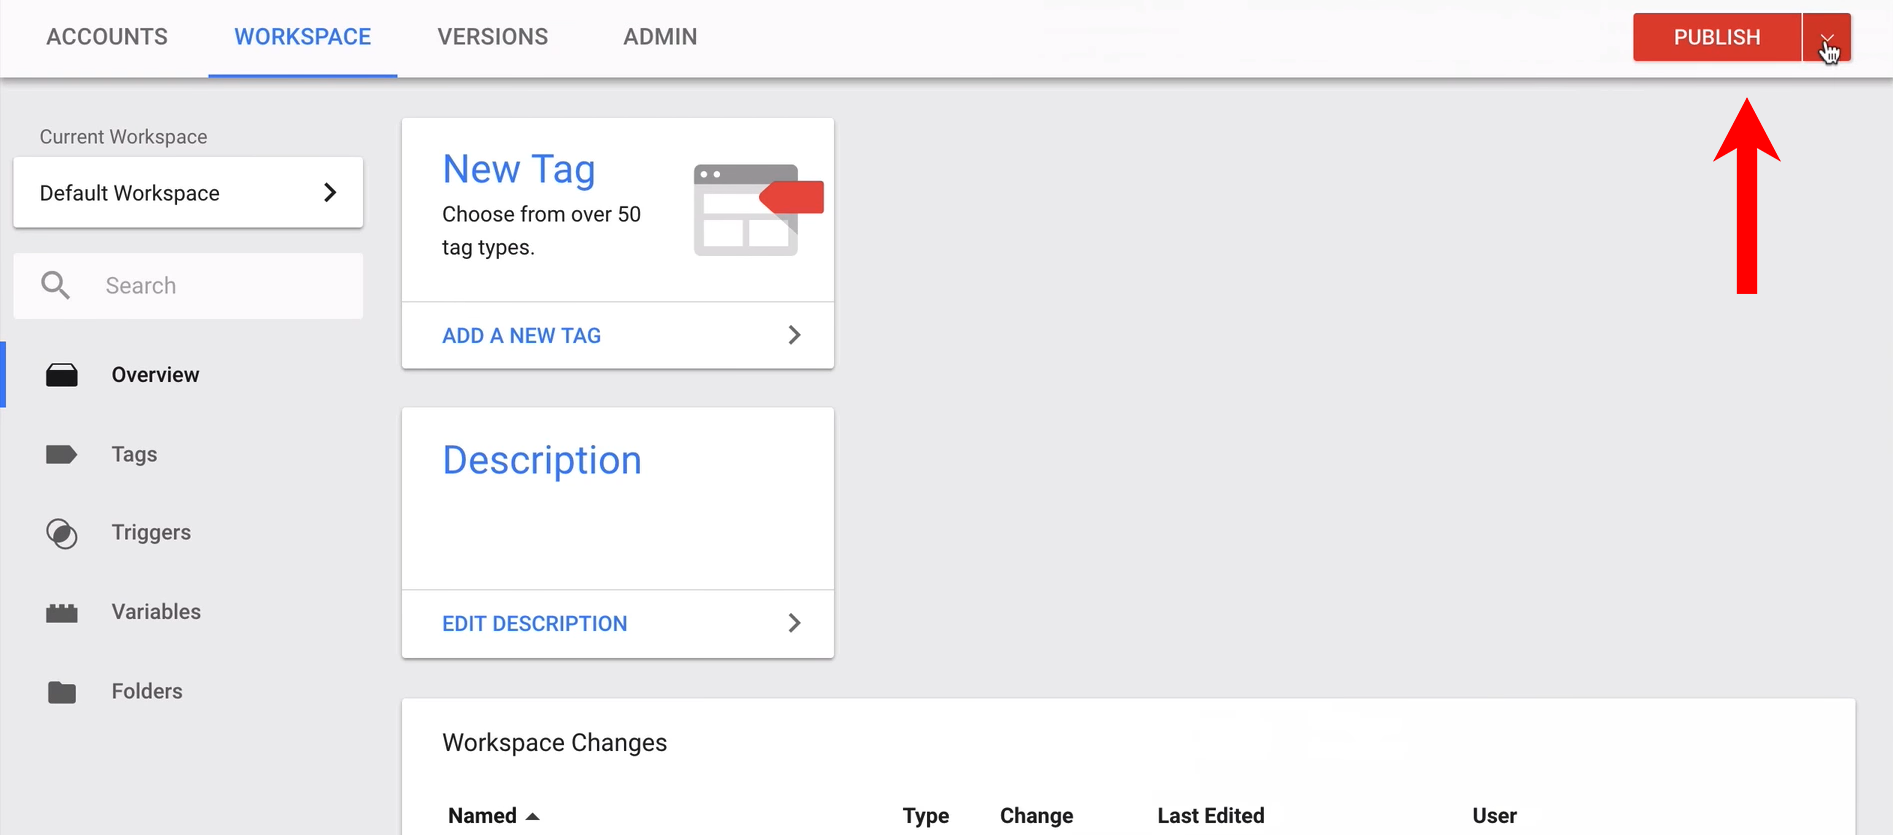
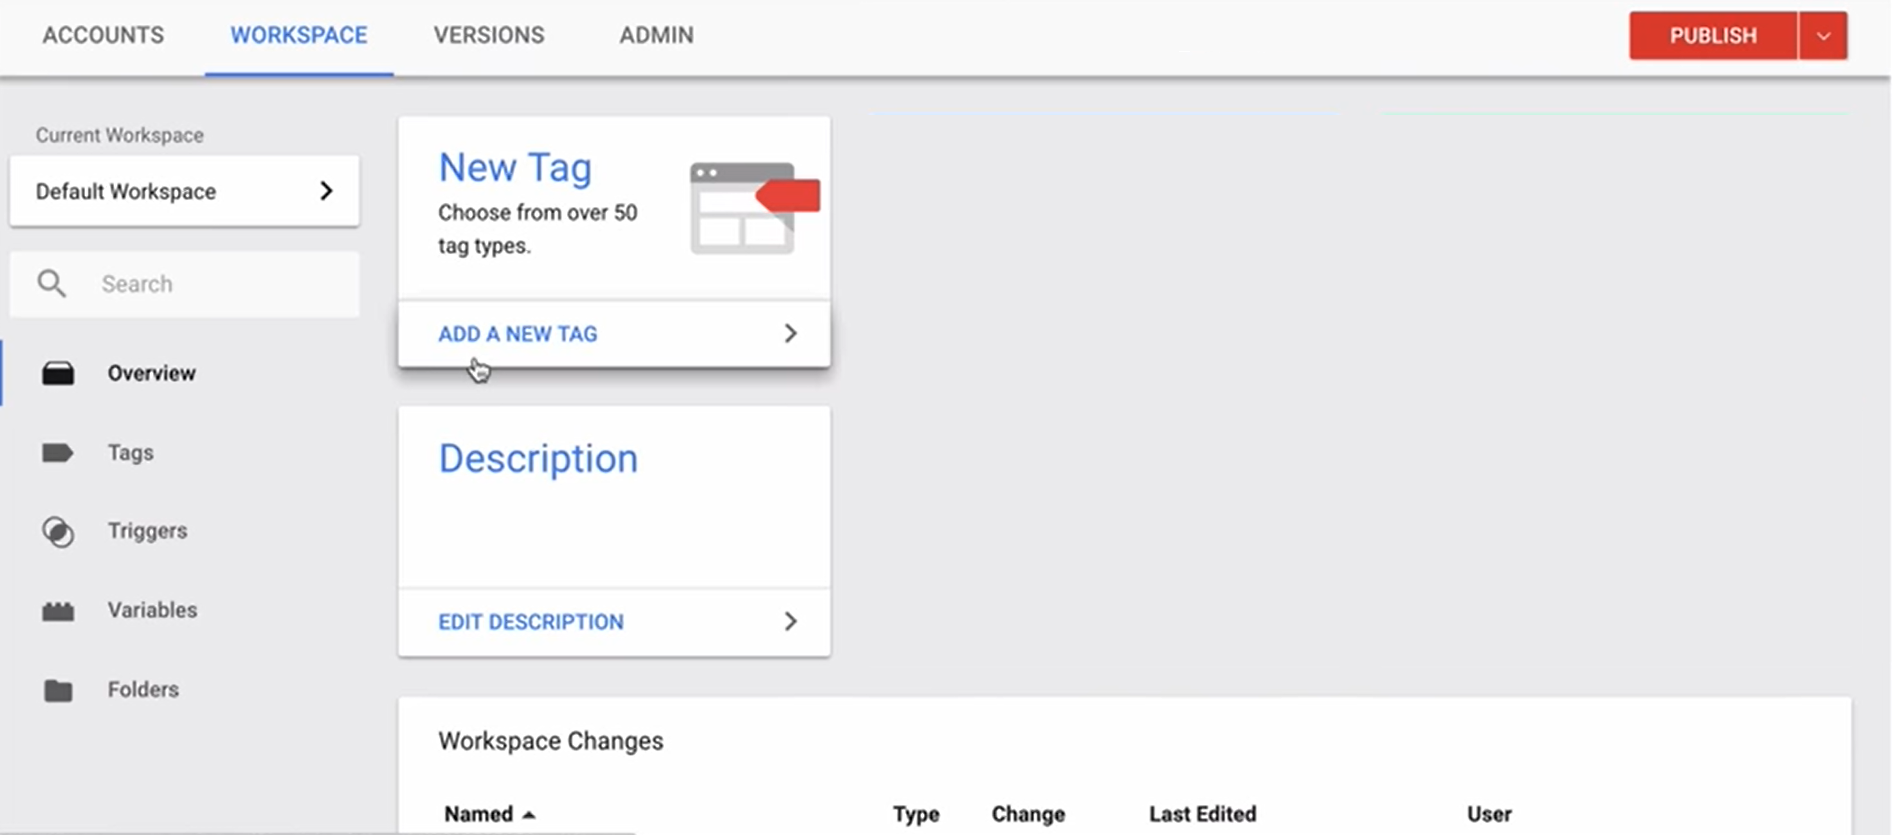
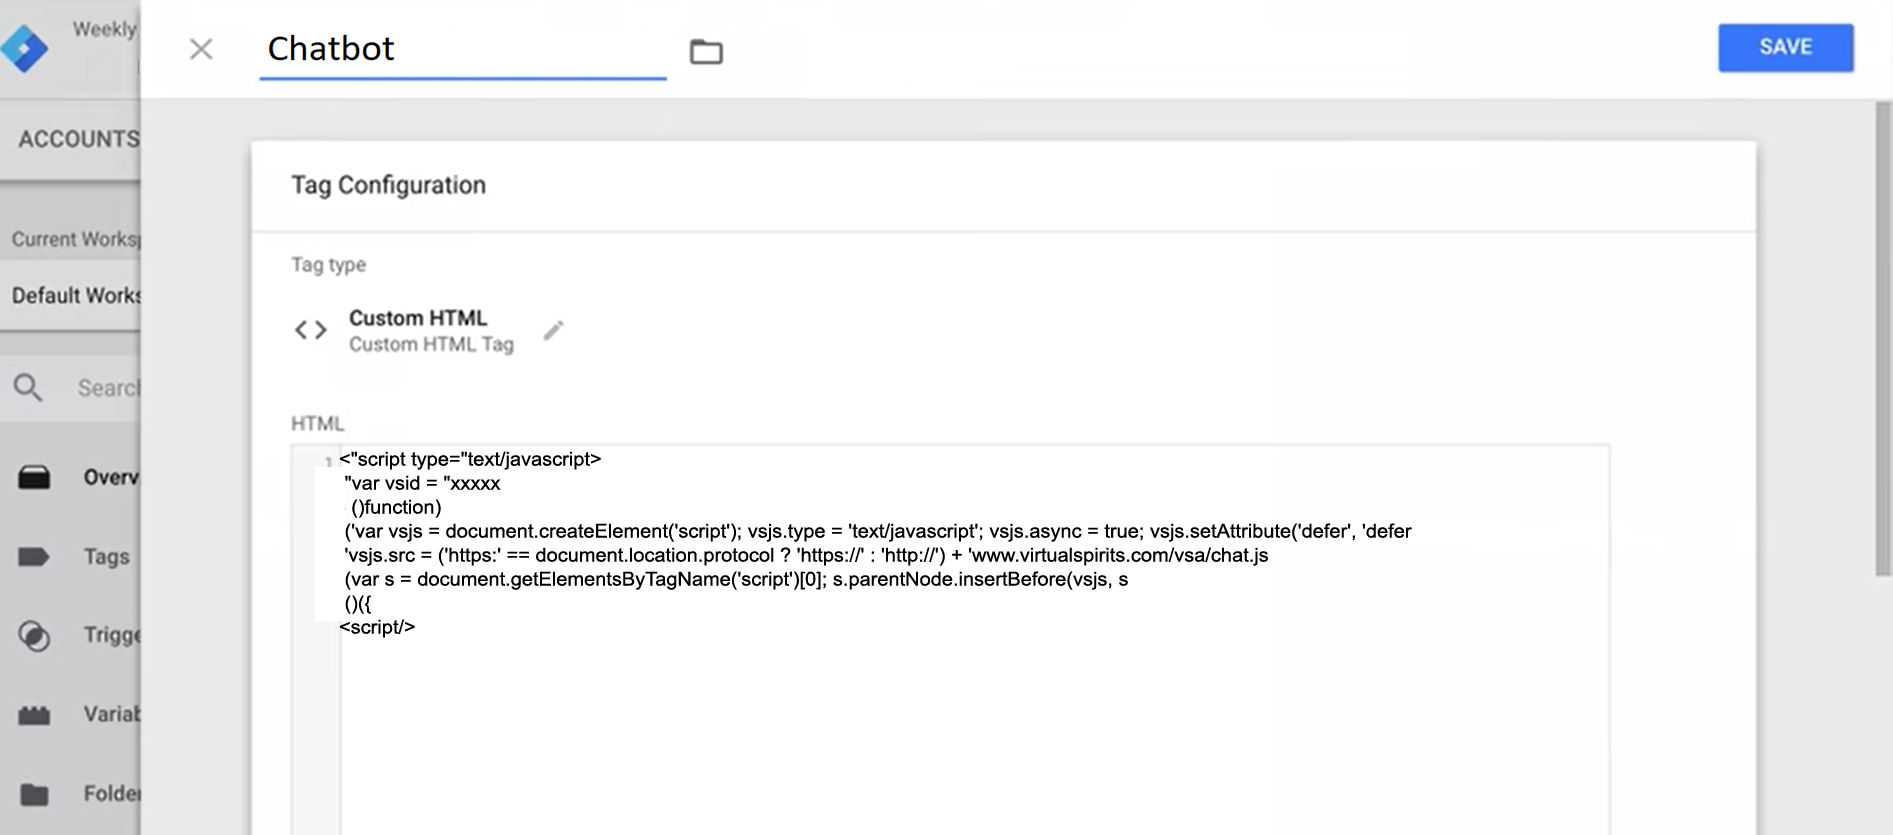
note: You can find your VirtualSpirits Chatbot HTML code in the control panel under 'add to website'.1. Go to Google Tag Manager dashboard. Add "new tag"
![add a chatbot with google tag manager](https://www.virtualspirits.com/images-help/google-tag-manager-add-a-chatbot-1.png)
2. Rename it "chatbot"
![add a chatbot with google tag manager](https://www.virtualspirits.com/images-help/google-tag-manager-add-a-chatbot-2.png)
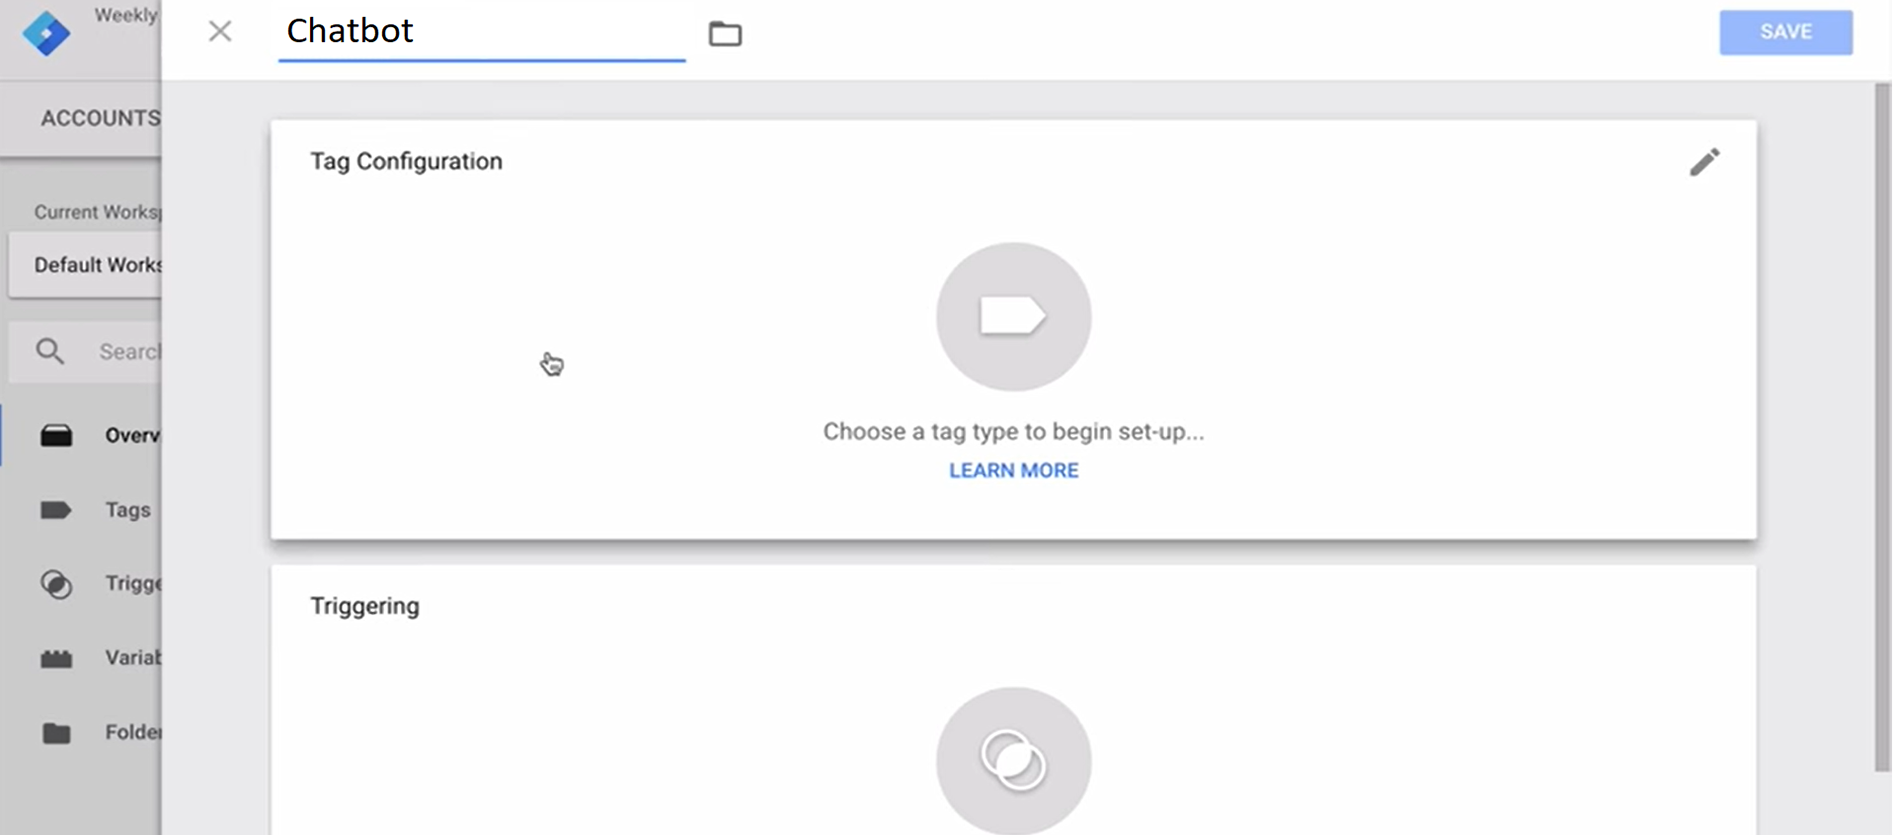
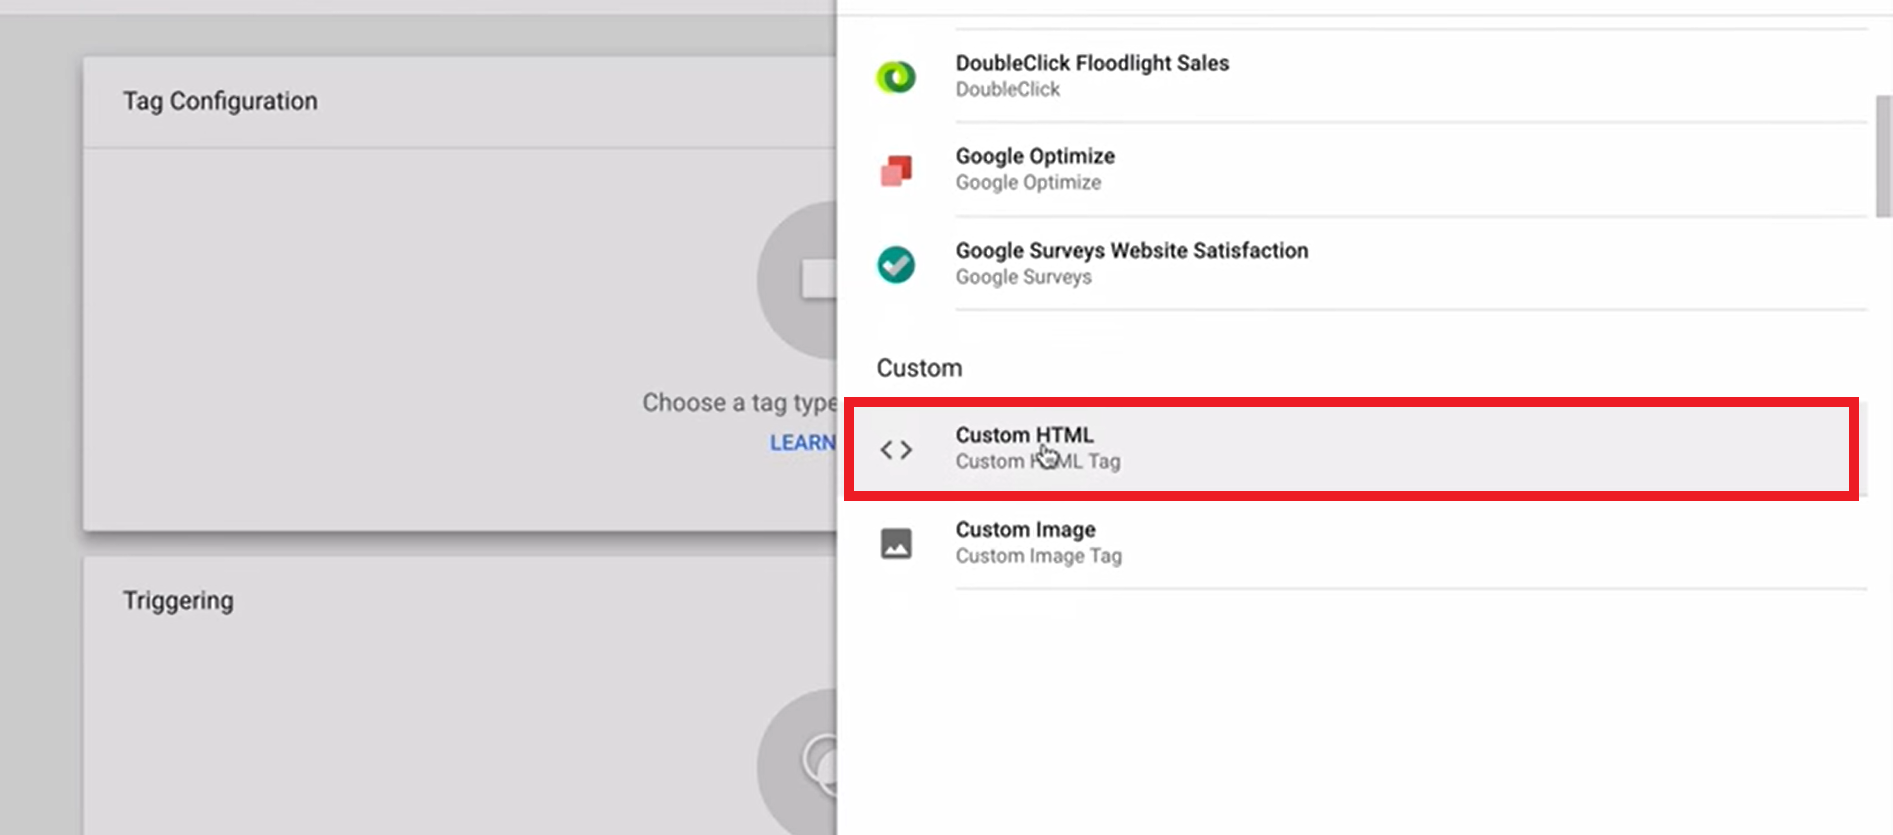
3. Click anywhere on the tag configuration tab. Then select "custom HTML"
![add a chatbot with google tag manager](https://www.virtualspirits.com/images-help/google-tag-manager-add-a-chatbot-3.png)
4. Copy & paste the Chatbot HTML code
![add a chatbot with google tag manager](https://www.virtualspirits.com/images-help/google-tag-manager-add-a-chatbot-4.png)
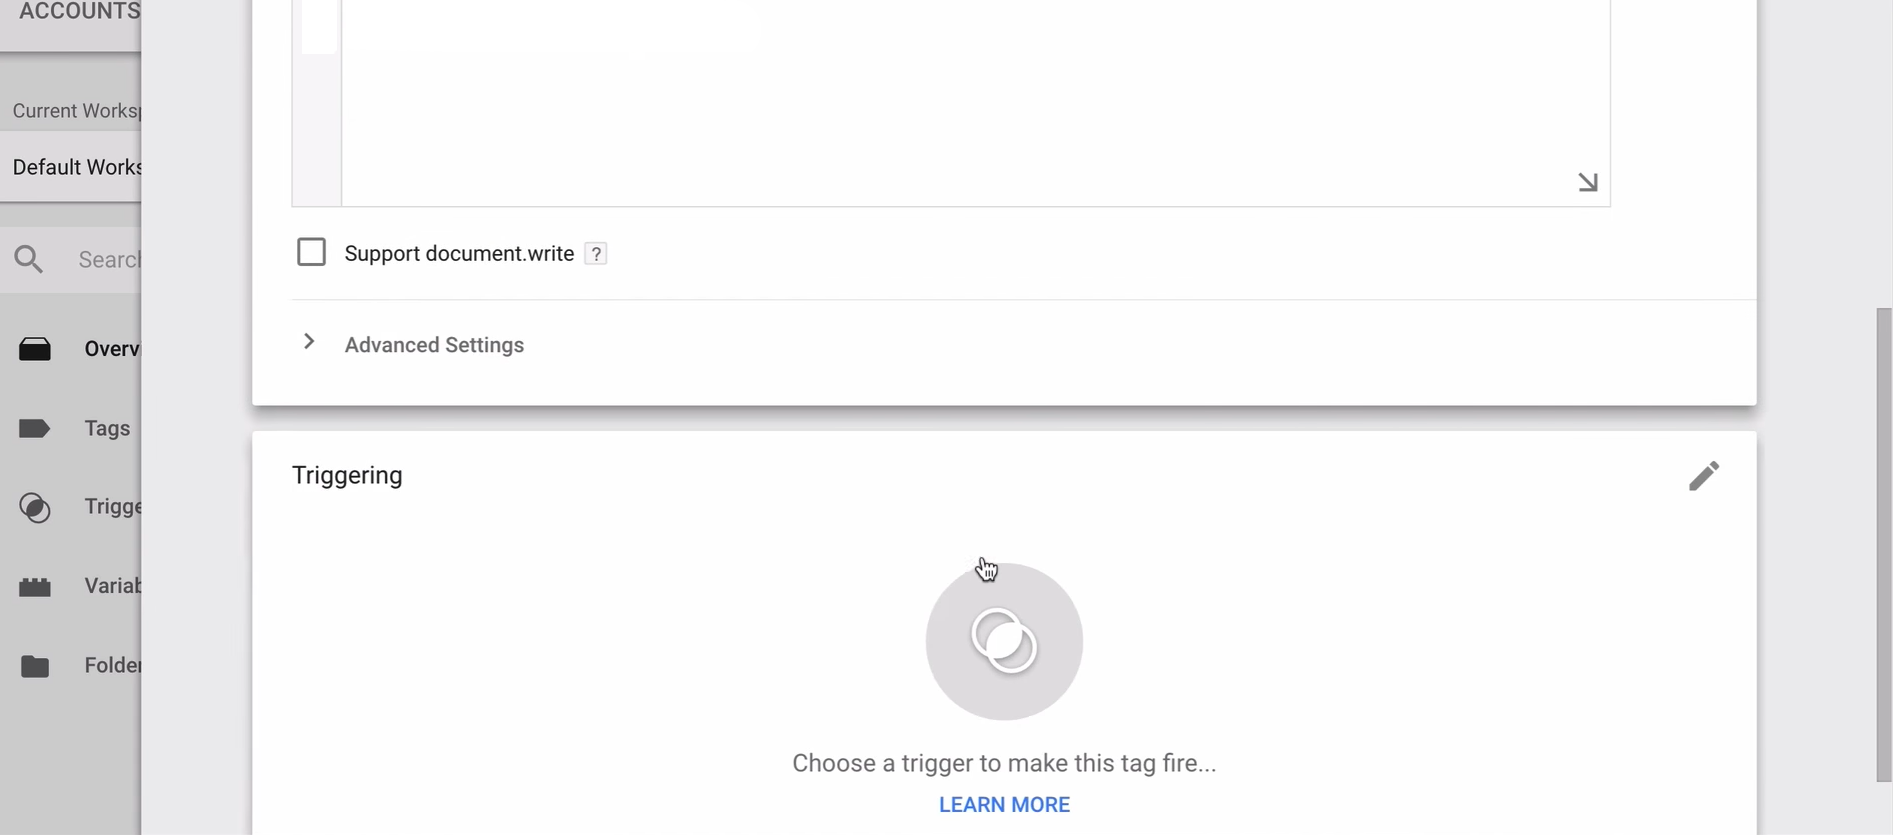
5. Click anywhere on triggering tab
![add a chatbot with google tag manager](https://www.virtualspirits.com/images-help/google-tag-manager-add-a-chatbot-5.png)
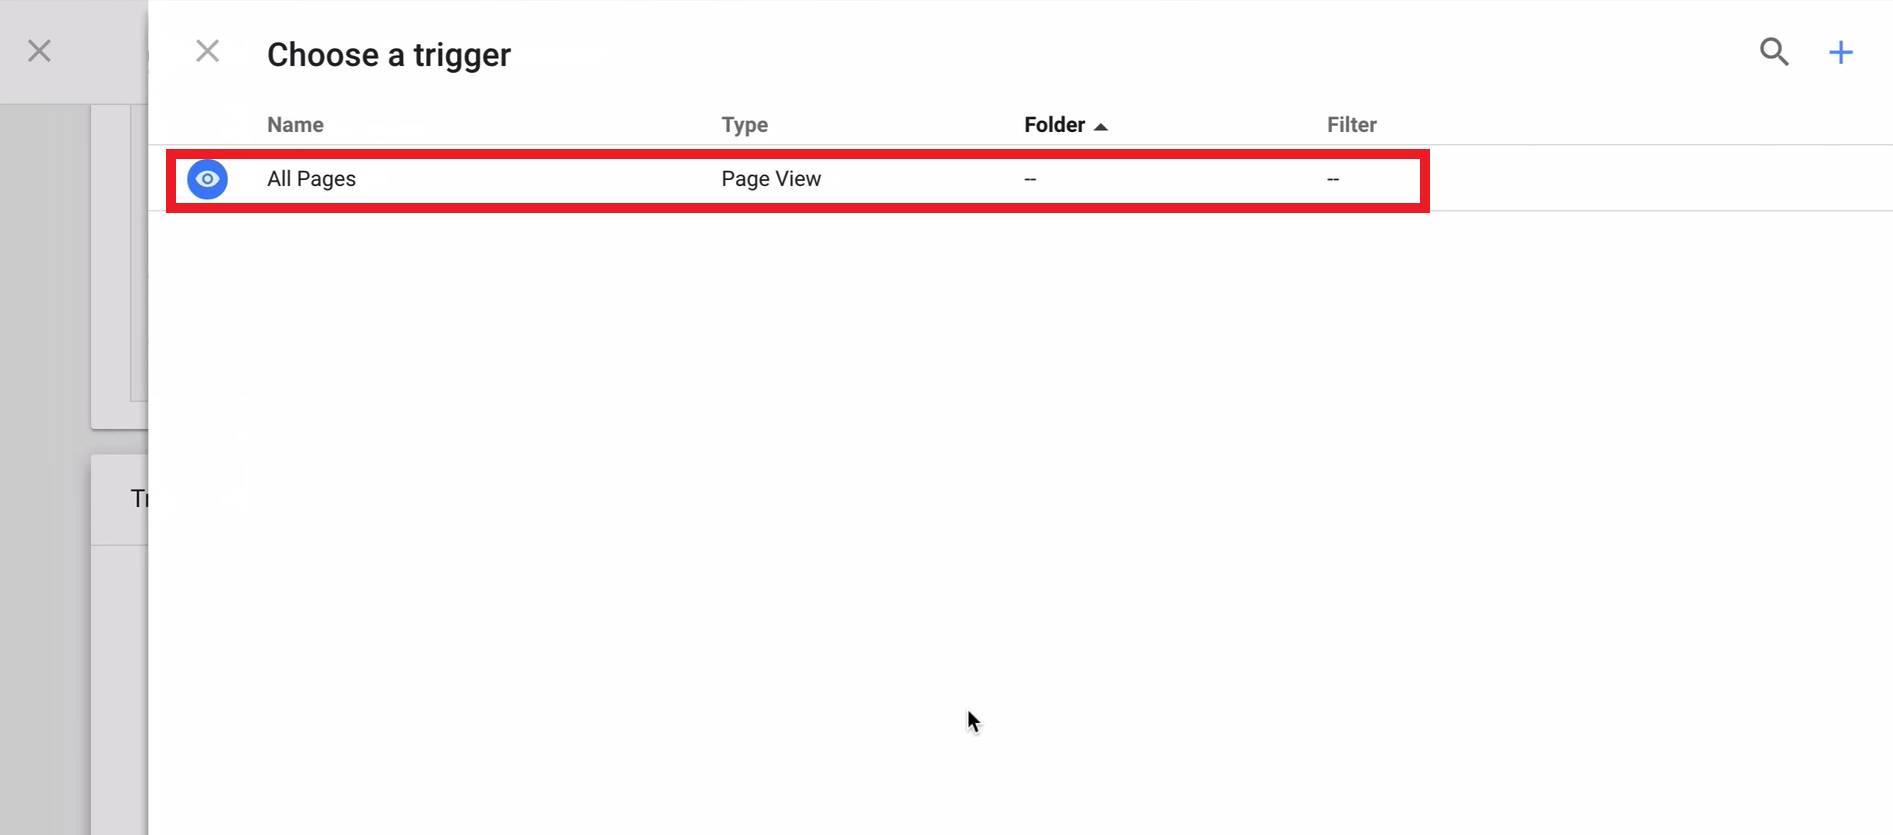
6. Select "all pages"
![add a chatbot with google tag manager](https://www.virtualspirits.com/images-help/google-tag-manager-add-a-chatbot-6.png)
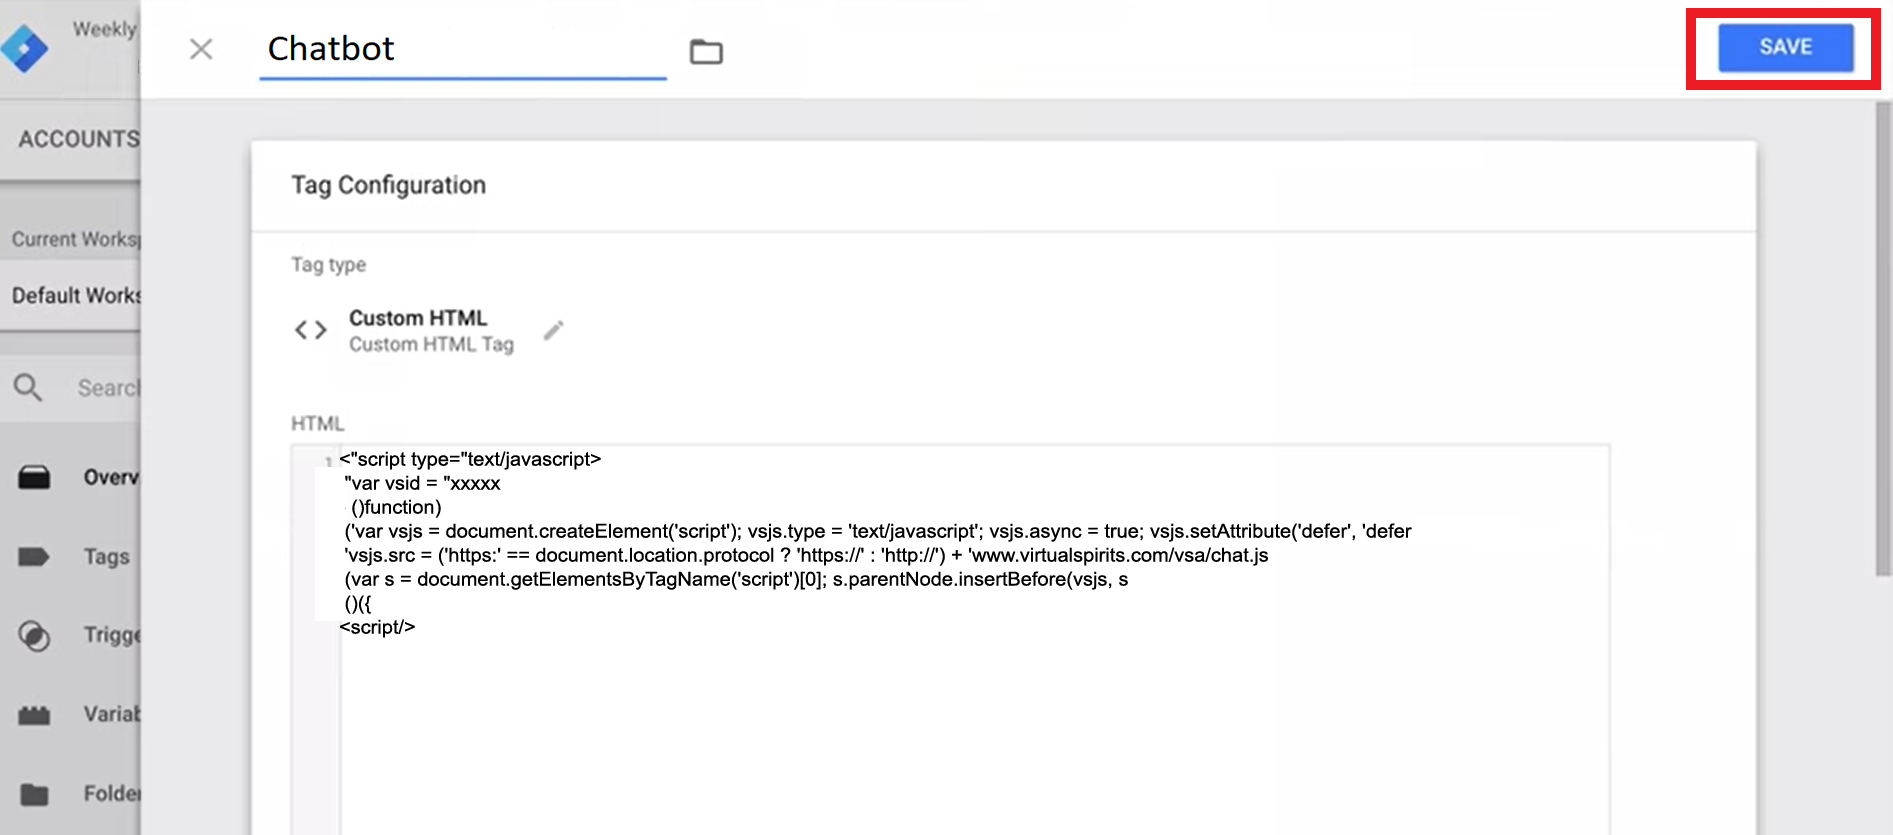
7. Click "Save" the new tag.
![add a chatbot with google tag manager](https://www.virtualspirits.com/images-help/google-tag-manager-add-a-chatbot-7.png)
8. Clicking "Publish" in the top right to activate it on your site